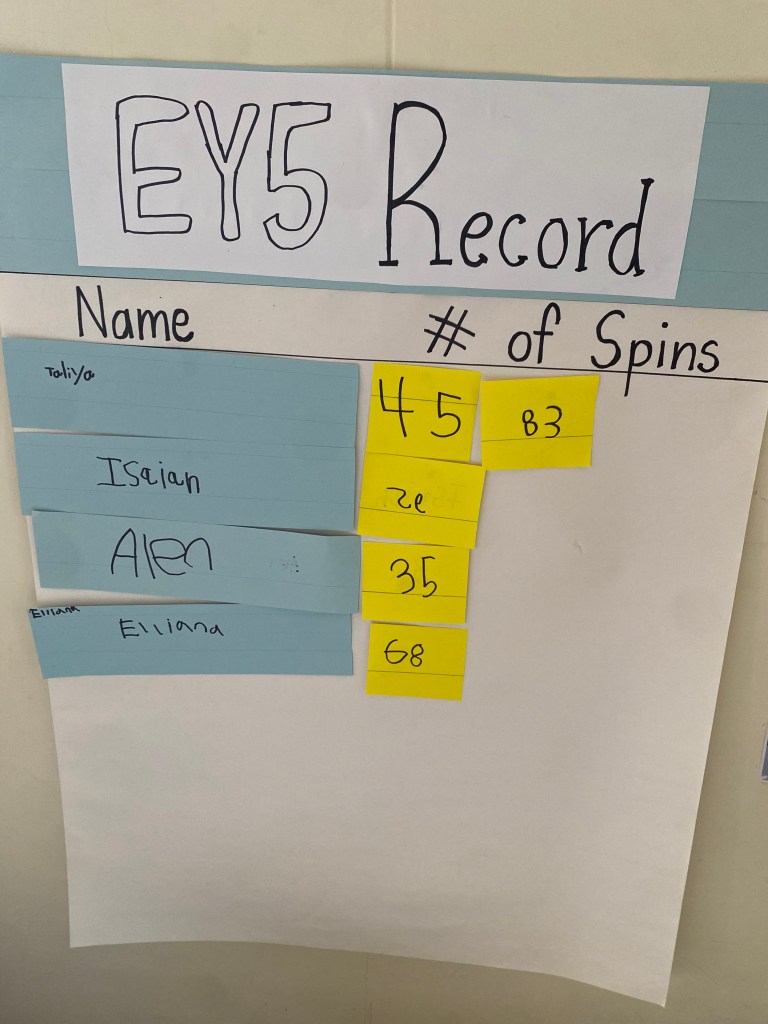
This chart came from a noticing I had that during a unit focusing on the concepts of design that the children in EY5 were very interested in spinning tops that year- Beyblades to be exact. These were the tops where you release the button and the top goes off and has a battle with someone else’s top to see which one will win and keep spinning. The problem was, the children kept bringing their Beyblades into school and naturally they would get lost or broken. So instead of banning them completely, I wondered . . . how can we make this at school so everyone can participate and where does math fit in with this activity?
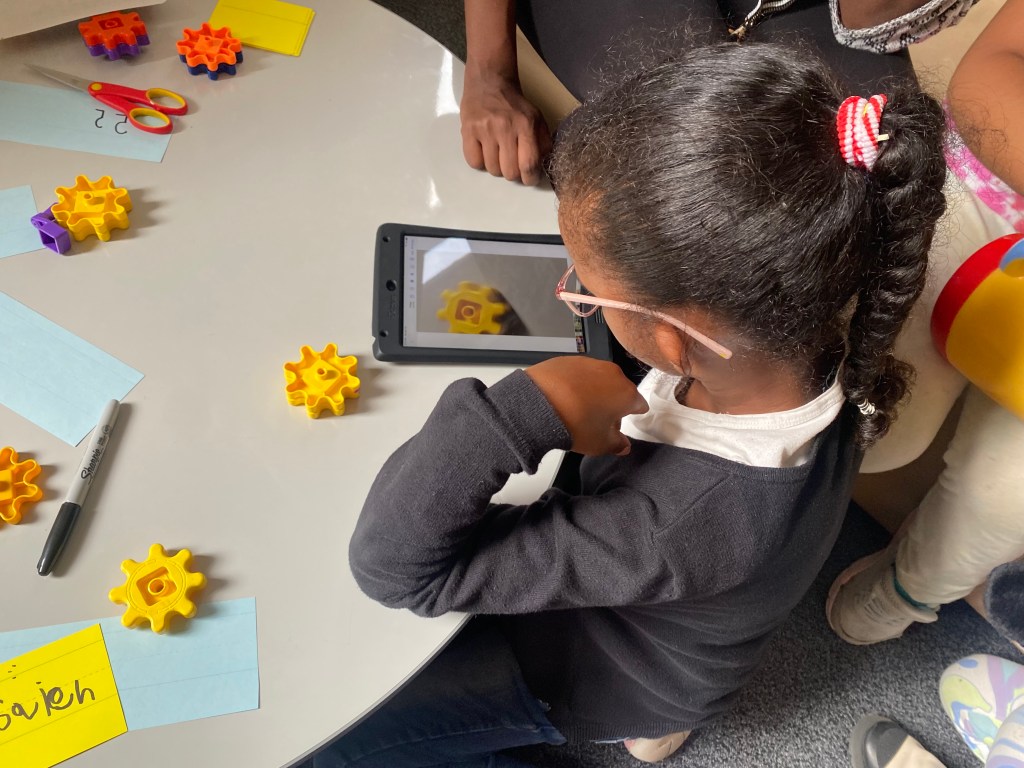
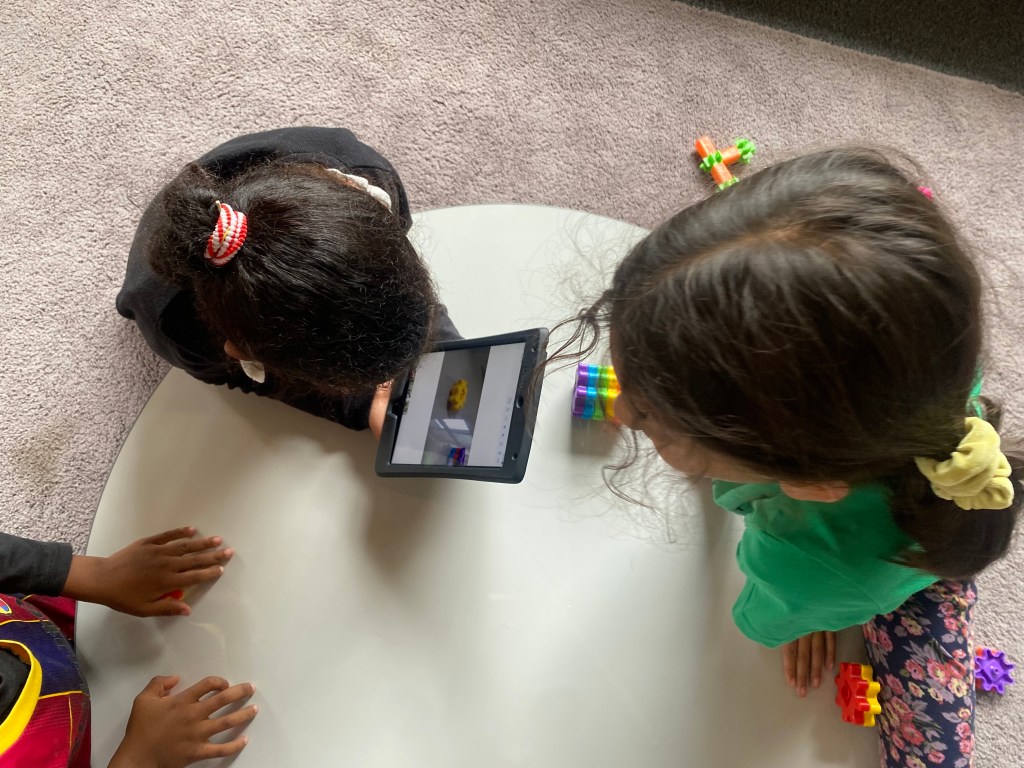
The children discovered that if you stack 2 gears on top of one another, its makes a spinner that resembled how Beyblades work. When given an appropriate flick, the gears would turn rapidly around on the tabletop. It was fun to see how quickly the gear-tops could spin, but the children were discouraged because they didn’t actually know who’s top was going around more. So we thought, how can we count how many times the spinner goes around more accurately?
This is how the idea of using our iPads emerged!
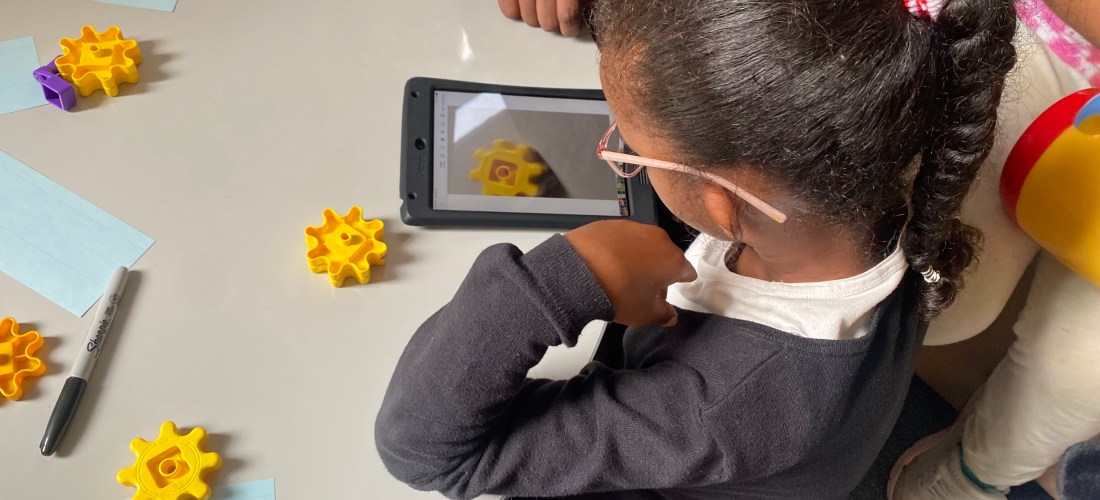
How it worked is the children used the iPads to take a recording as the top was spinning using the slow-motion feature on the iPad. After the spinner came to a halt, they rewatched the spin in slow motion carefully counting every time the spinner went around. Sometimes the children needed to watch the video more than once to get a better idea of the exact number.
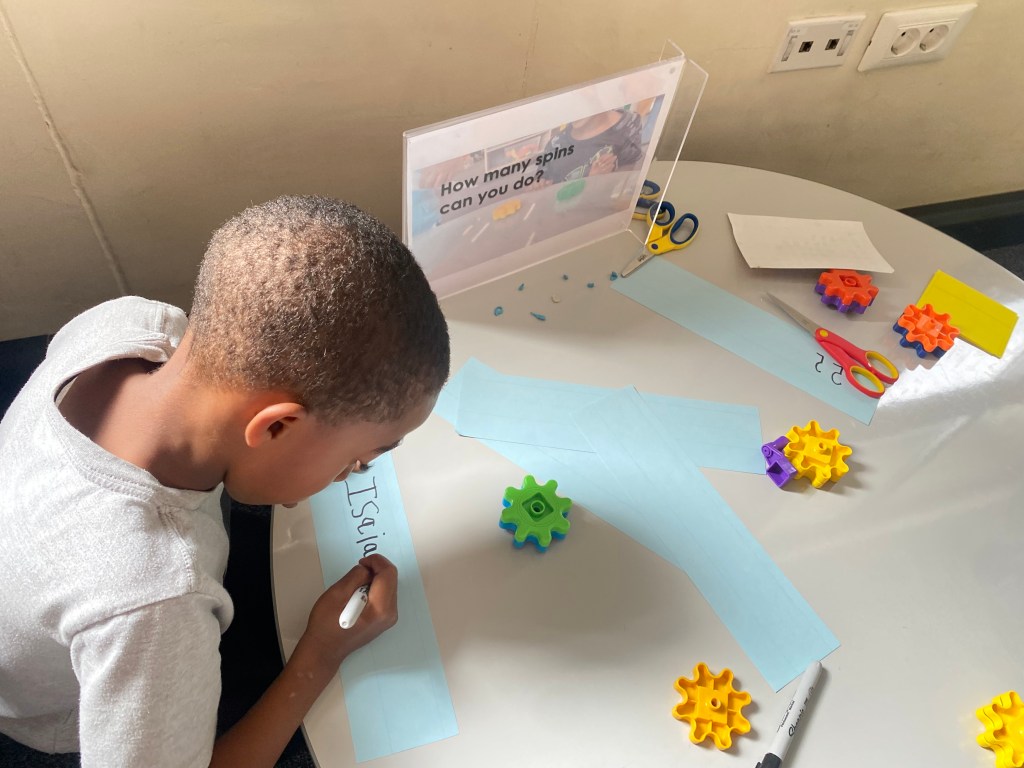
Once confident in the number they got, the children wrote down how many spins they got on the chart next to their name!
The children were so interested in this project, that they wanted to do it again and again. They tested different types of spinners, adding more or less gears to see if this sped up or slowed down the spin. They also did more than one spin to see if they could beat their record. The chart was the last step in this process to make our thinking visible, showcasing our hard work and to give the children a little more practice writing the big numbers they were determining when they counted each spin.
It was a memorable because the children took it into their own hands, and could go through the steps themselves. Additionally, coming from their own interests, the children were motivated to continue to add to the project and create a station that lasted in our learning environment!
Before I answer the question of how to make a unit documentation book, let me first share a little about what a unit documentation book is. A documentation book shows the flow of the unit over time from the beginning to the end of the student’s journey and engagement with a Unit of Inquiry. It is a place for photos, writing, ideas, and wonderings to be recorded, and it is a shared space between the students and the teacher. It is visual and portable: a tool for learning. There is no “right way” to make a unit documentation book, and therefore in labeling this post “how to make” my intention is simply to inspire creativity and share in the various ways I’ve used this type of book. The most important thing is that this book becomes a meaningful canvas for learning to happen.
There’s really only two steps in the how-
Choose your canvas: I’ve found an oversize poster paper book works well as it is easy for students to see during carpet time and large enough for multiple students to use at the same time during other engagements.
Visually document your unit of inquiry, starting from the beginning. Here’s where the magic happens- where true creativity can occur to construct meaning. The options for documenting are endless but here are some you might consider using for your unit documentation book.
Document QuotesAfter an Engagement
Document students ideas as visual quotes after a learning engagement. The learning engagement could be independent learning time (such as open inquiry) or it could be a group lesson where students demonstrated understanding of a topic. Reflect with the students on their learning as a class community, discuss how each quote connects to the key or related concepts from the unit. Visually mark the related concepts and use photos to support student understanding.
2. Unpack Unit ConceptsTogether
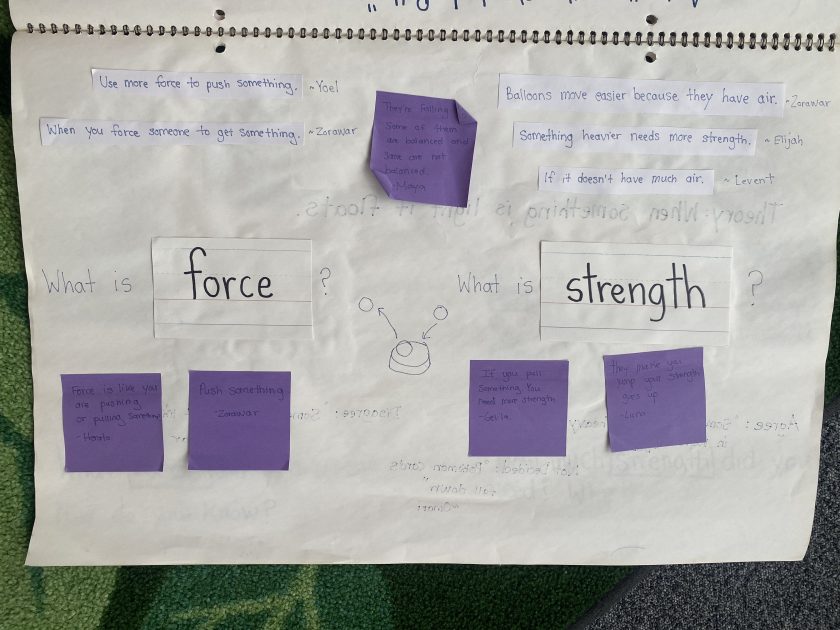
Unpack unit concepts, compare them and/or define them together. Record student examples and ideas to review a concept and the come up with a class definition or use a students idea as a definition for the team. Discuss with students the similarities and differences of the terms.
3. Map a Main Idea or Storyline
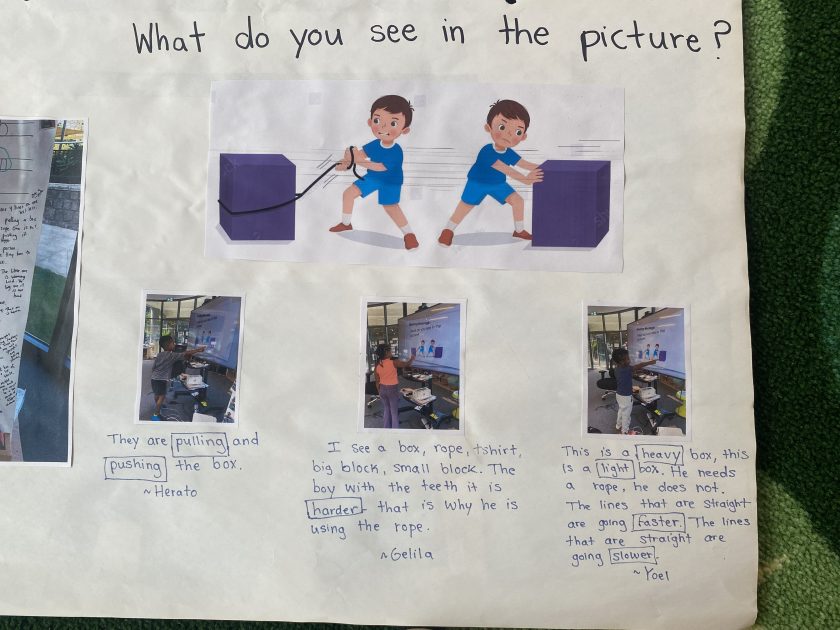
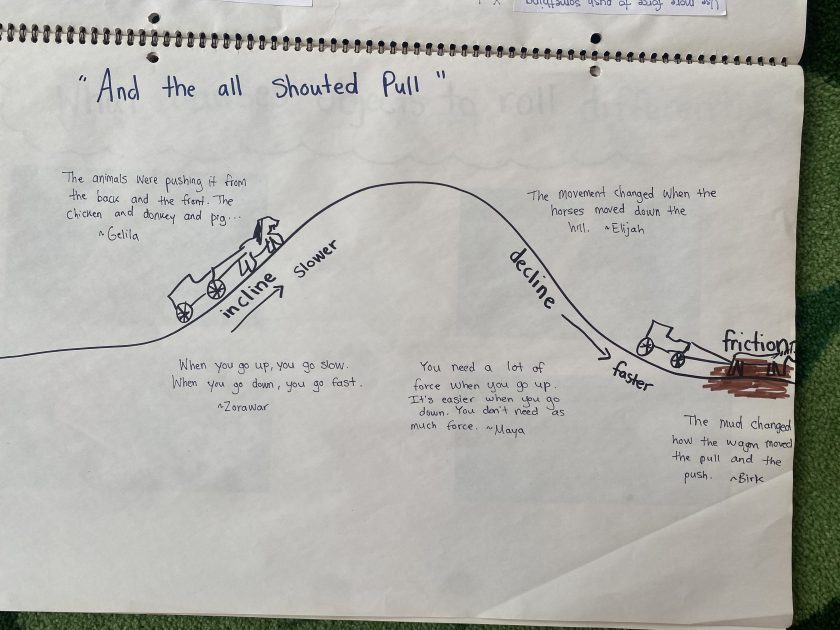
Review the main idea or learning from a text read together. After reading a story together connected to the unit, consider what new vocabulary or concept you want students to understand. In the picture on the right, I wanted my students to between understand what causes an object to change the way it is moving.
4. Explore a Learning Theory
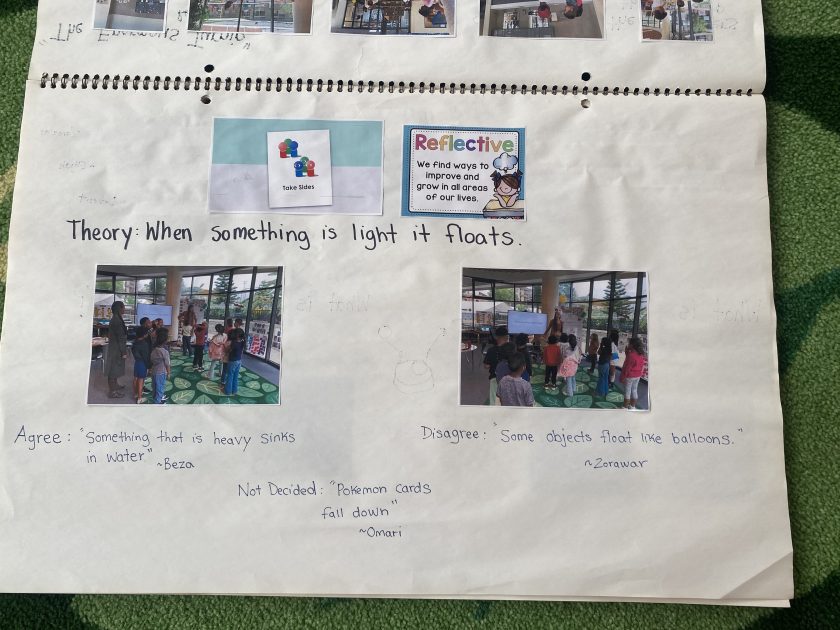
Unpack a learning theory together. For a theory that students are particularly challenged by, write it down and reflect together considering all perspectives. Consider first playing the game, “take sides” where students stand on one side of the carpet if they agree with the statement, the other side of the carpet if they disagree with the statement or in the middle if they are undecided. Afterwards make the learning visual and reflect further!
5. Do a little bit of everything!
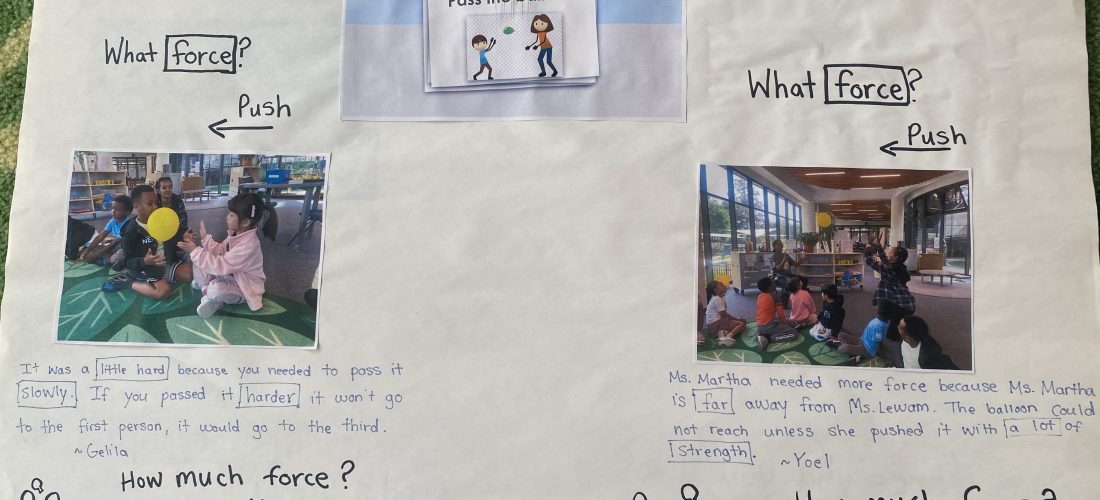
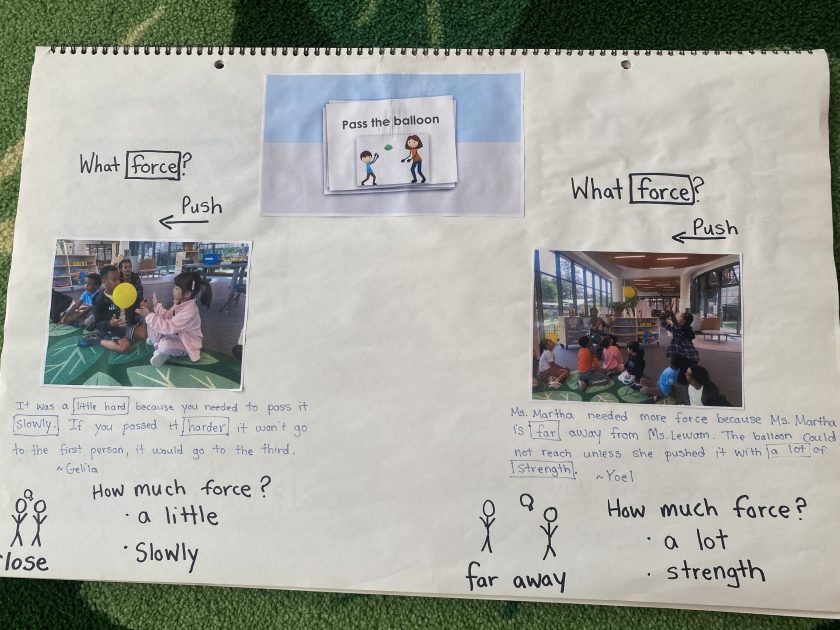
Again there is no right way or wrong way to use this type of book. On this page on the right I started by showing the students the direction of the “push” force. One of the pushes shows a short distance for an object to move, the other push shows a longer distance for the object to move. Students described these pushes in different ways, however no student used the word “distance” therefore this was our “pre-learning” page on distance, to come back to once students deepened their understanding of how distance can impact forces.
When I was working as an Intern in South Korea, one of my mentor teachers once told me that he did not see the purpose of worksheets. He strongly believed that there was no organizer the students couldn’t make themselves, or concept that couldn’t be more creatively introduced or dug into. He would further rationalize this belief in describing how not using worksheets was also more sustainable, as through a game or activity the skill can be practiced again and again rather than just once on a disposable paper.
To this day, whenever I see a worksheet being used in a classroom I can’t stop my brain from undergoing a thorough investigation on the necessity of the sheet. I’ll often find myself conceptualizing what a parallel lesson could look like that would use all the same components, but none of the wasted resources. I’ve brought this into my own teaching as much as possible, finding great satisfaction in designing something that has permanence and authenticity.
Literacy instruction is an area of education that is often chock -full of printable sheets. And although, I believe handwriting is a critical component of any well-balanced program, I think there is a time and place for pencil and paper writing in the Early Years. To show some examples, I take you into my own Early Years space where intentionally draws students to the same concepts and at times very same activities that a worksheet provides, but in a playful child focused way.
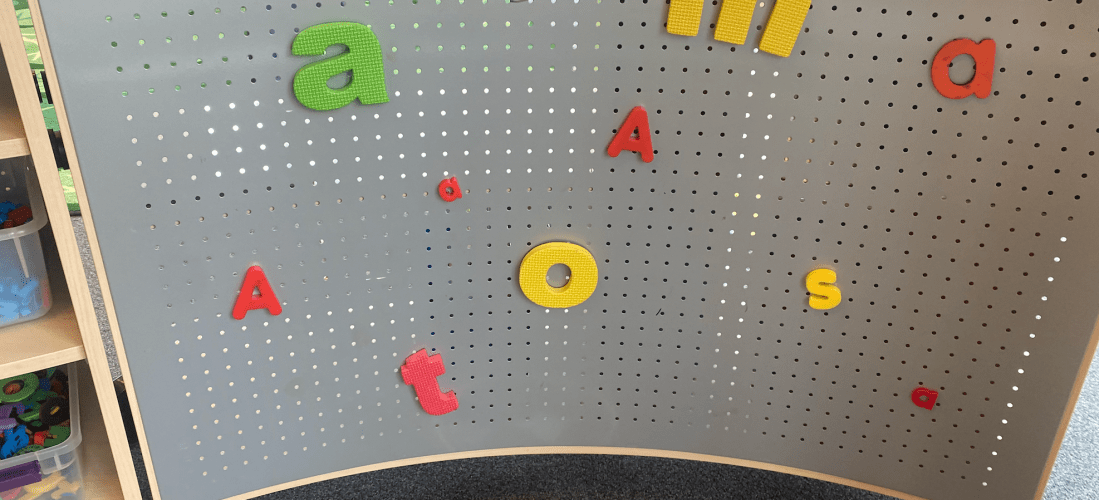
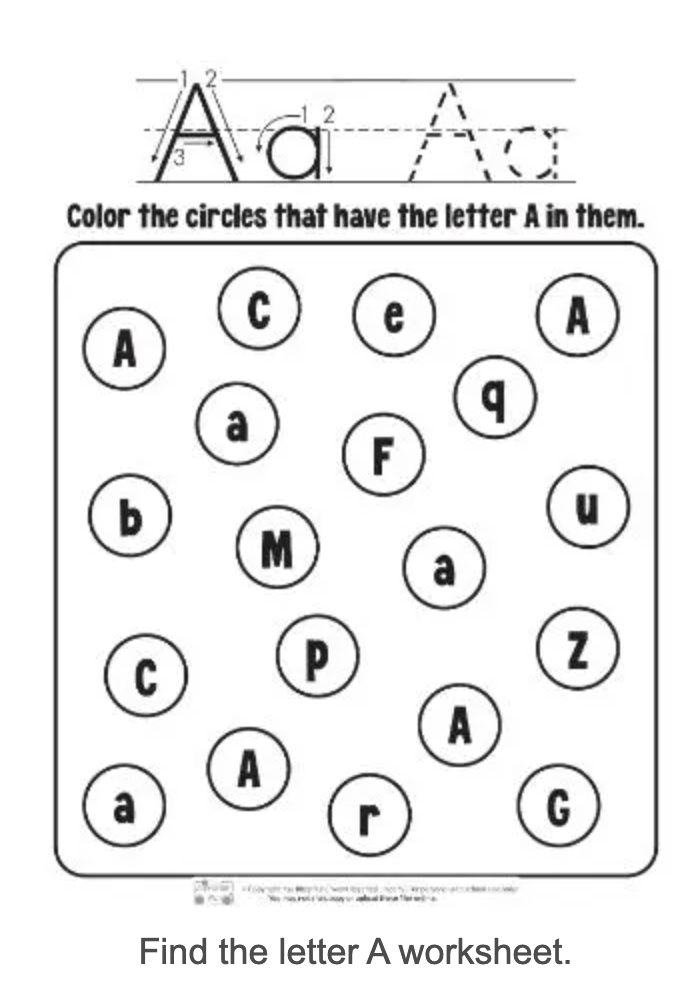
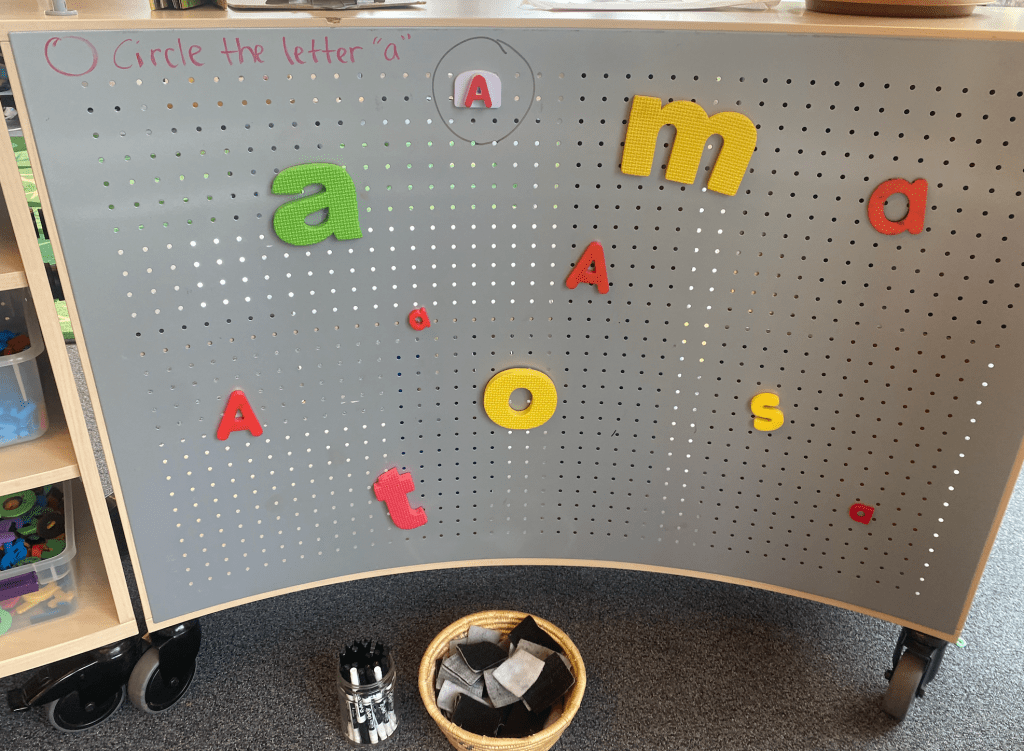
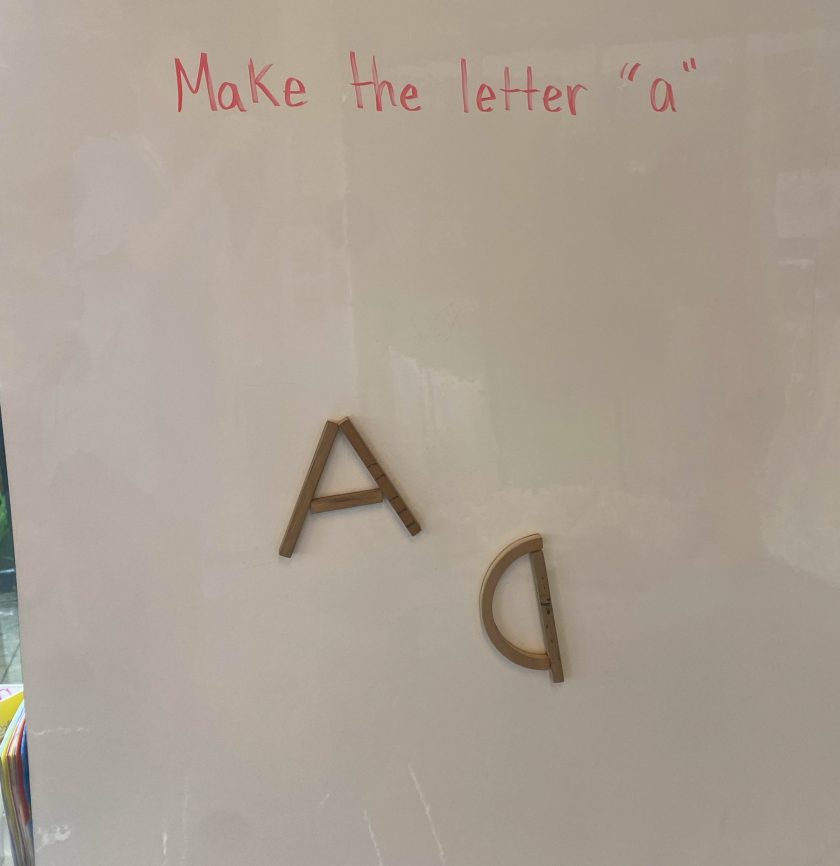
On the left, you can see a standard alphabet worksheet. The letter of the day is “a” and the child can engages in a search style activity to color in all the corresponding letters. On the right, you see a magnetic board low to the ground for child-use with a very similar activity. Letters of different sizes, font styes and colors are available to the child and whiteboard markers to draw a circle around each “a.” A similar activity, but presented in an entirely different way.
Permanent Area for Play
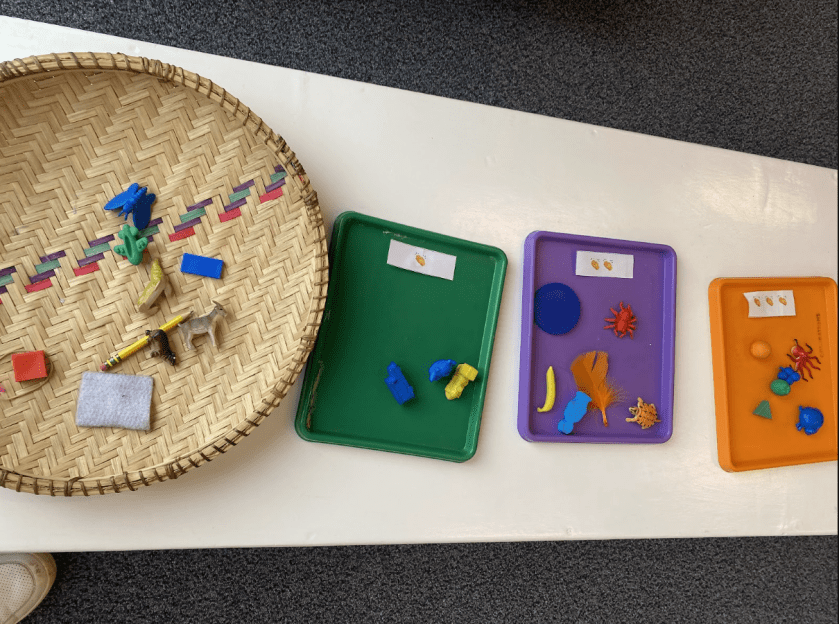
To give another example, consider a syllable sort designed for children to determine the number of syllables in a given word. Lots of worksheets have students cutting out and gluing pictures under the correct number of claps. Cutting and gluing are both excellent skills for children to be practicing alongside the skill of detecting how many syllables are in a word, but if you’re looking for something that can be used over and over again, why not make a syllable sorting station? Students will enjoy picking up their favorite toys and objects around the room to sort into the correct tray marked by a clap symbol.
Sort the Objects into the Correct Tray
For this last example, I’ll come back to the idea of letter formation, and how children learn to not only be able to identify a letter but also be able to form it. As I said before, there is a time for pencil and paper letter writing. However letter formation does not need to be that black and white (literally!). Children can learn to how to form the letter before they learn how to “write” the letter and here are some developmentally appropriate ways!
Draw, Trace or Form the Letter
Construct the Letter
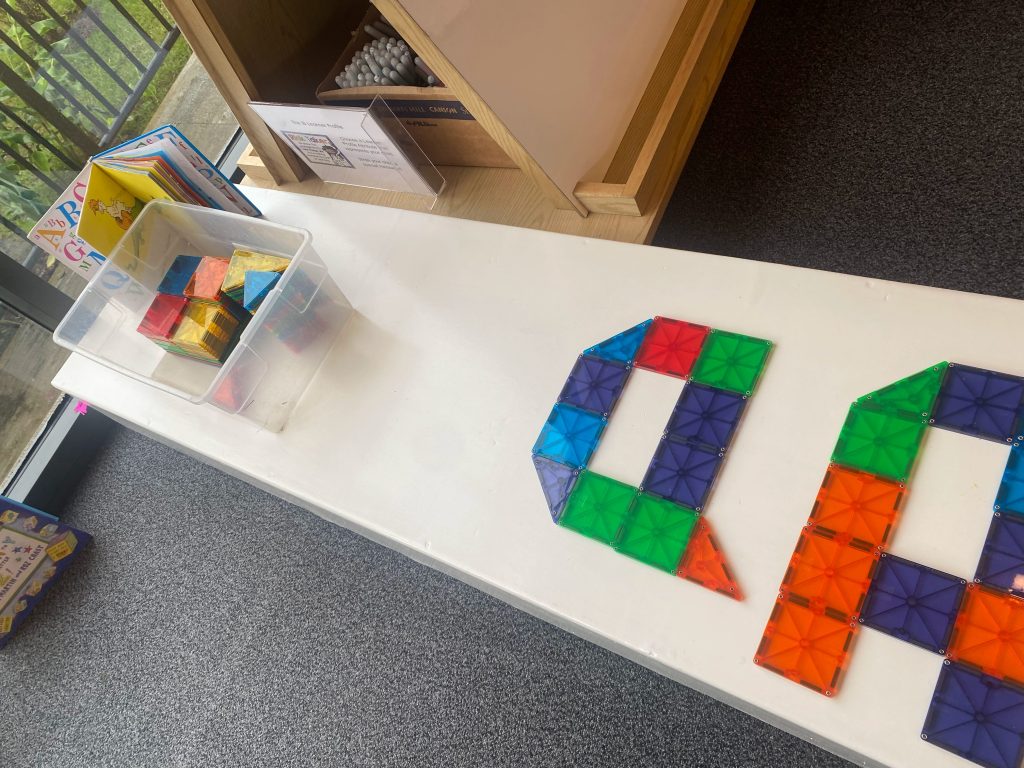
Build the Letter out of Magnatiles
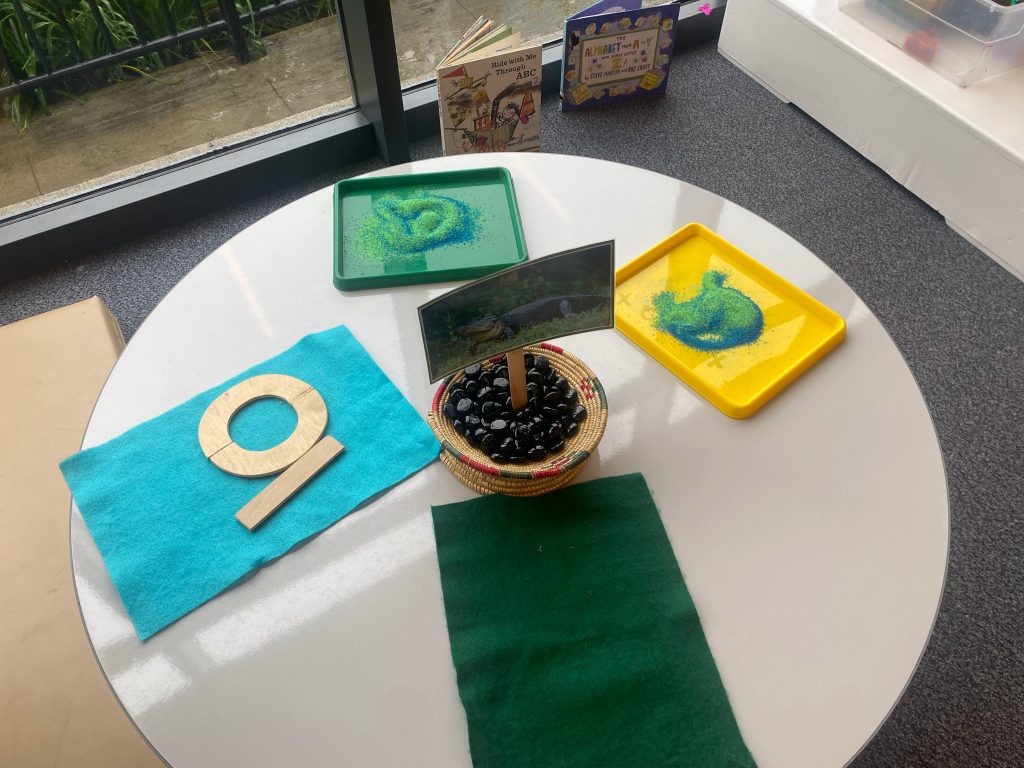
Interactive materials and a variety of ways to use them allows children the choice and freedom to practice forming letters how they wish. Children are encouraged to try many ways of making the given letter, or can spend time reviewing letters they already know way. It’s a win-win because they can play with some of their favorite toys like magnatiles and sand during this time to be creative in how they complete their letter design.
There isn’t a roadmap for taking ideas off of paper and bringing them at large into the classroom. It’s a mindset shift that once you identify, can become hard to ignore. Planning for it takes time, but it gets easier once you recognize how it looks and what resources can replace paper. Additionally, it’s not just on you, children can create their own activities and games to set-up in the space as well! It’s all about experimenting to see what could work, and embracing a new way of thinking.
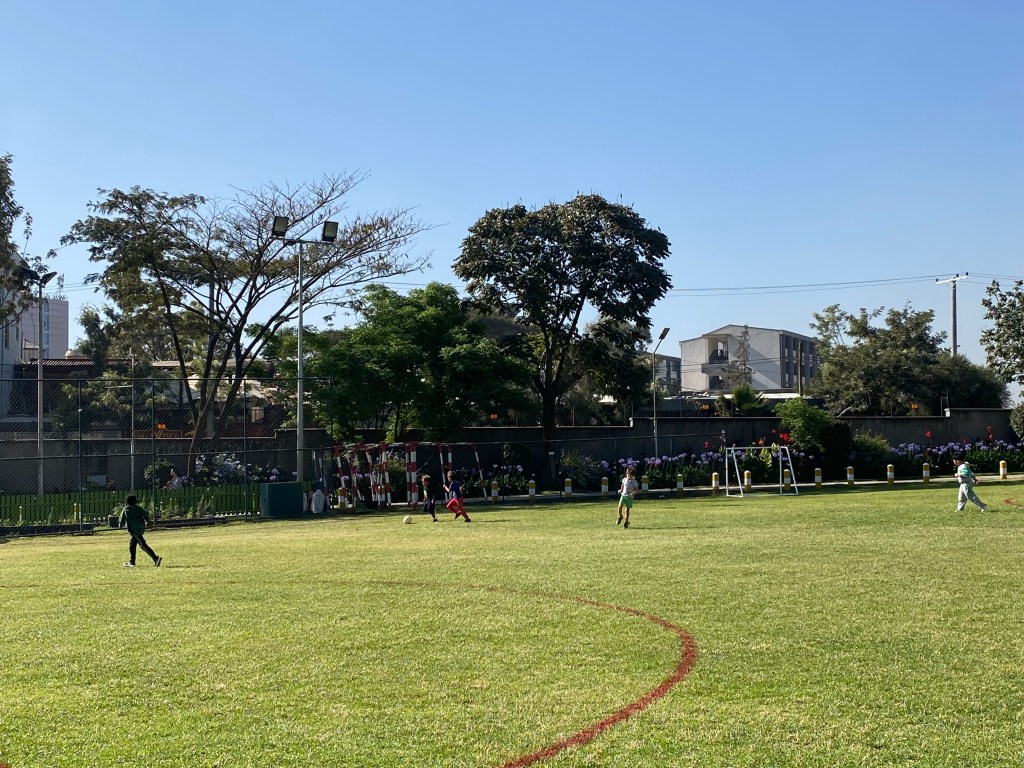
Numbers are all around us; we just need to look for them. So often, we choose to ignore the numbers right in front of us—the numbers that are part of our everyday routines and the daily desires of our students. Or maybe we don’t choose to ignore them. Maybe we are so conditioned to a particular curriculum or methodology that we bypass the logic of everyday numbers entirely. We don’t mean to; it is just something that happens. But what if “page 24, section b, scenario number 8” was not what happened tomorrow? What if the only thing that happened was answering a single question . . . How did Ronaldo get so good at football?
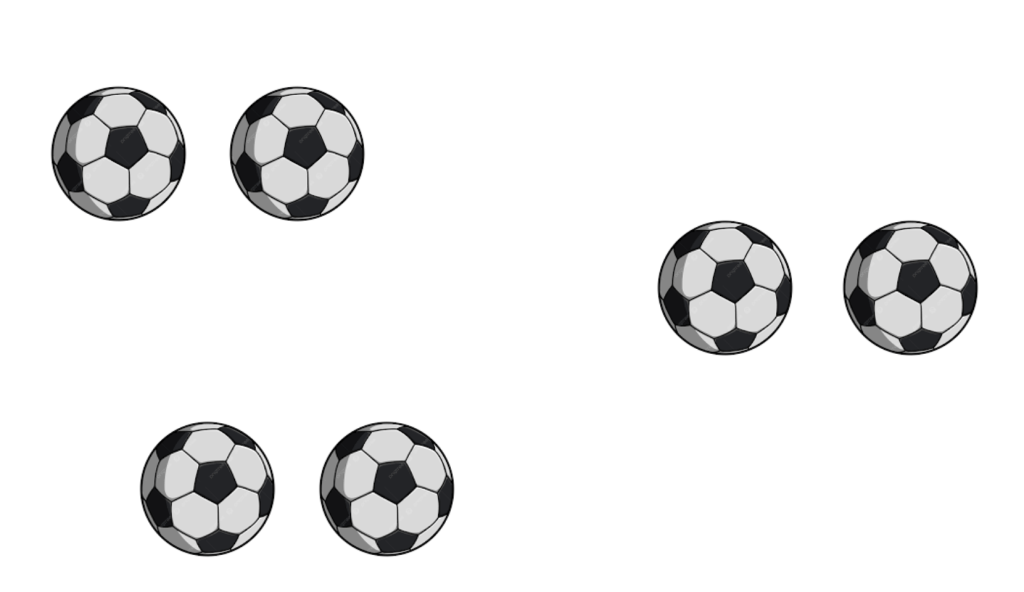
Quick! Look carefully, there’s footballs flying at you. Left, right look everywhere. How many footballs do you see? A quick flash thinking exercise as a warm-up, a crash course in subitizing that keeps them alert for the game. The only preparation? Copy and pasting some footballs onto some slides, or even having the kids cut out some footballs themselves and gluing them onto index cards to challenge their friends. Tell the kids its a way to warm-up for the match. Ronaldo stays alert with his mind and his body to think quick during a game.
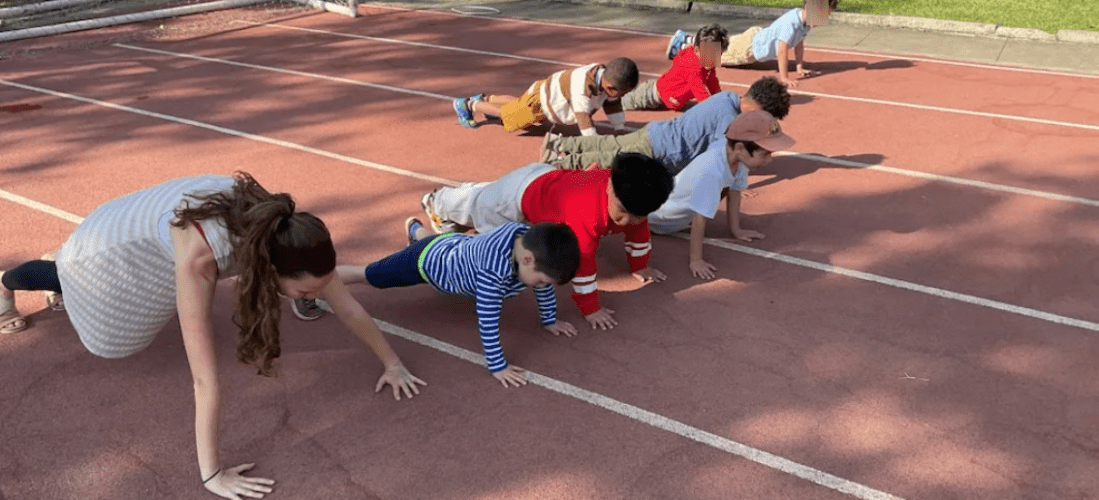
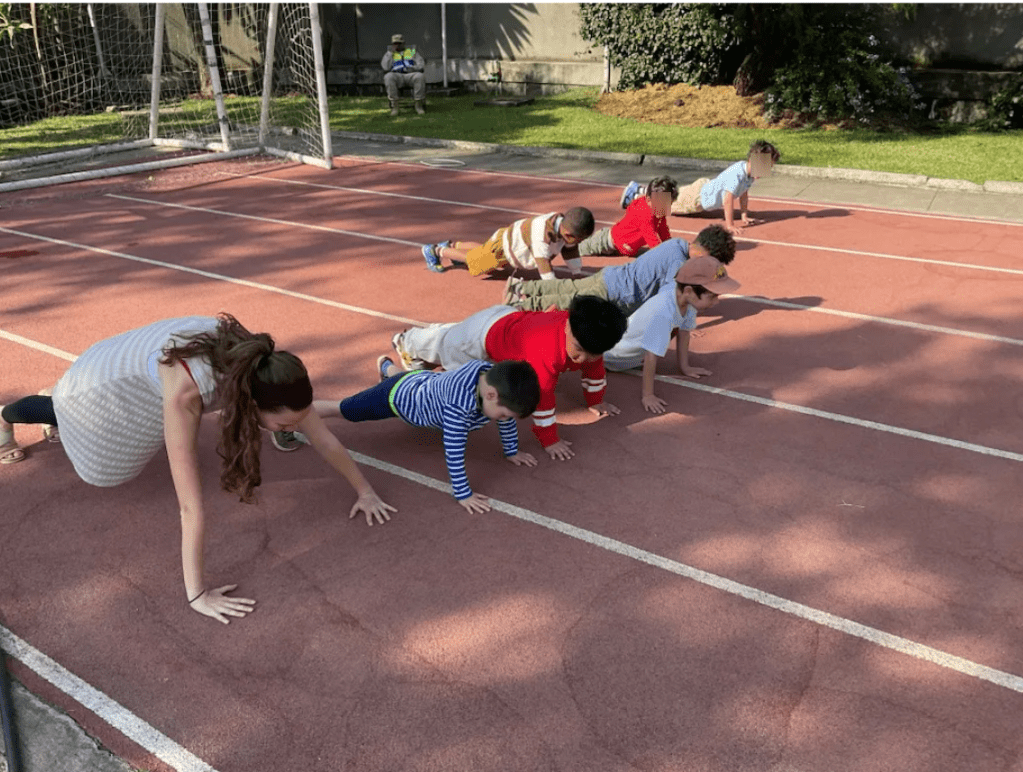
Time to warm up! Now that our minds are warmed up, it’s time to do the same with our bodies. Heading out to the track for some exercises builds both our strength and our rote counting skills. One by one, the children pick an exercise they want to lead and choose the count for how many repetitions we are going to do together. Most of the children count by ones, but some choose to challenge their teammates with skip-counting. As they go down with each push-up, you can hear them chant: “5, 10, 15, 20…”
Ronaldo always warms up before he plays.
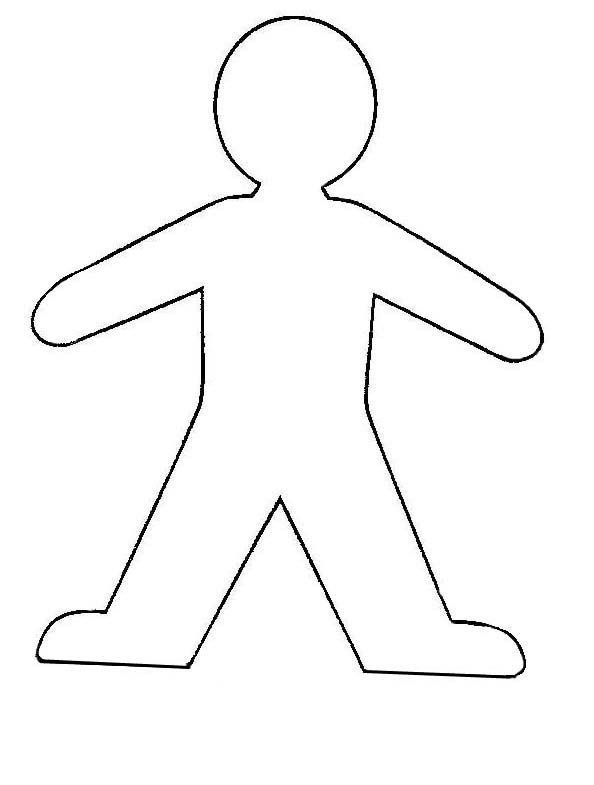
Okay ready to play! But wait . . . we need Jerseys. Ronaldo is number 7, but what number do you want to be? The children design their own Jersey and write their favorite number on the back. Can you identify all the numbers from the Jerseys of your friends? What numbers are missing? We write down a list of the numbers we are missing in case more friends want to join us to play later.
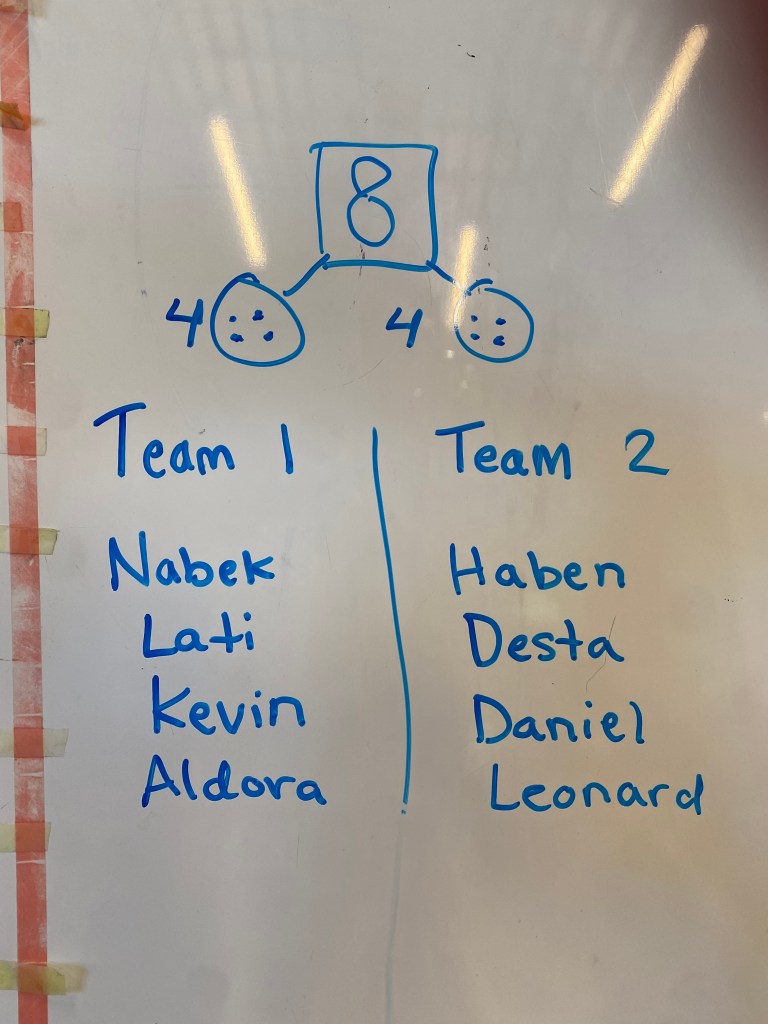
Finally, we are ready to play, but there is a problem… there are 8 students. How many students should we have on each team? We use our paper players as concrete manipulatives, moving them around to figure out what even teams look like and practicing our problem-solving skills. “Even” means that the teams have the same number of players. It looks like there will be 4 players on each team, since 4 + 4 = 8. Let’s double-check with a part-part-whole model to ensure our teams have two equal parts!
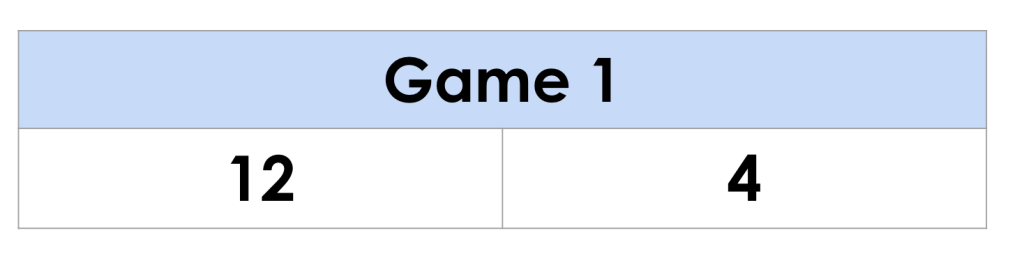
It’s time to play, we just need a way to keep score. The children decide they can use a white board to write a tally each time one of the teams gets a goal. At the end, we will know how many goals each team scored. One child volunteers to be the official score-keeper, proudly recording each mark.
Great job, teams! The game is done. But before we can go to snack, we need to compare the numbers to see which team won. Twelve is larger than 4, but by how much? Let’s use the “count on” strategy to figure it out together: 5, 6, 7, 8, 9, 10, 11, 12. That’s 8 more than 4! Can anyone tell me how many goals were scored altogether? Let’s start tomorrow by calculating the total number of goals. I wonder if fewer or more goals will be scored the next time you play.
Time to have our snack to fuel up for some recess and more football! Ronaldo would be back on the field before no time.
Central Idea: Forces make things start, stop and move in different ways
Lines of Inquiry:
How objects move in different ways (Function)
How forces change the way things move (Causation)
How movement can be changed (Change)
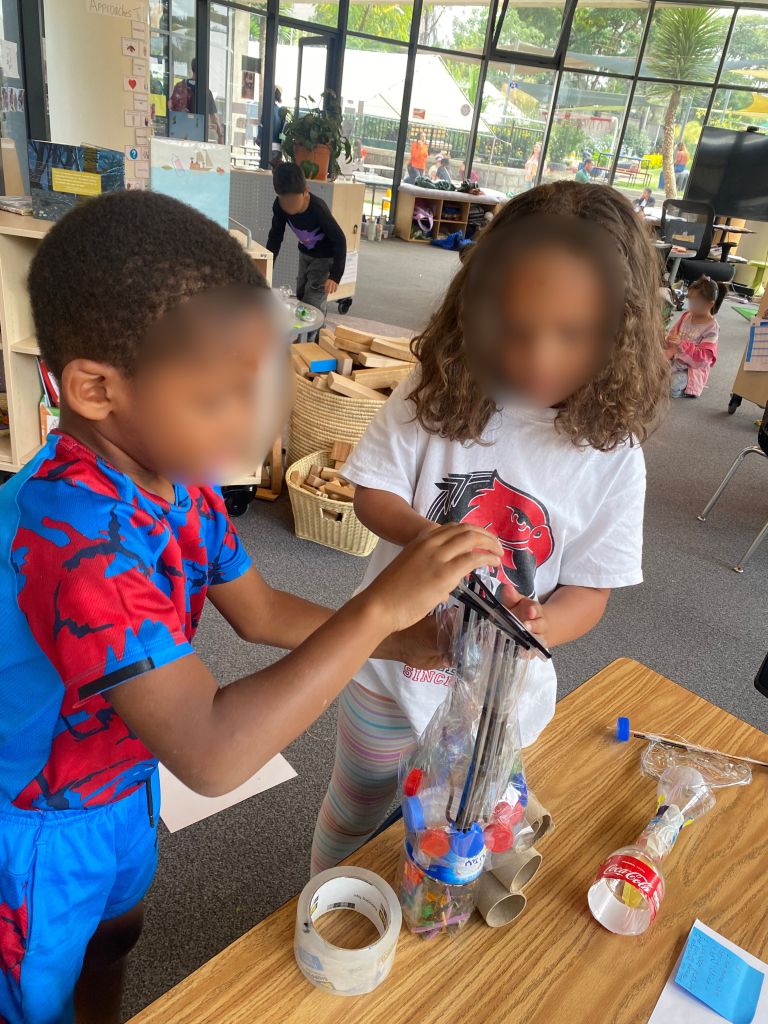
To wrap up our unit on forces and motion in a fun, engaging way we introduced our students to the story, “Galimoto” by Karen Lynn Williams. In this story, a young boy uses wire to make a push-toy car to play with. As a form of action, we challenged our students to use recyclable goods to make a toy that uses force or motion when played with. First, students identified what types of materials and resources we had at school that are considered, “recyclable.” We discussed how an item can be recycled if it is being used again for a new purpose. Students had many ideas, arguing that even the clay from art class could be recyclable!
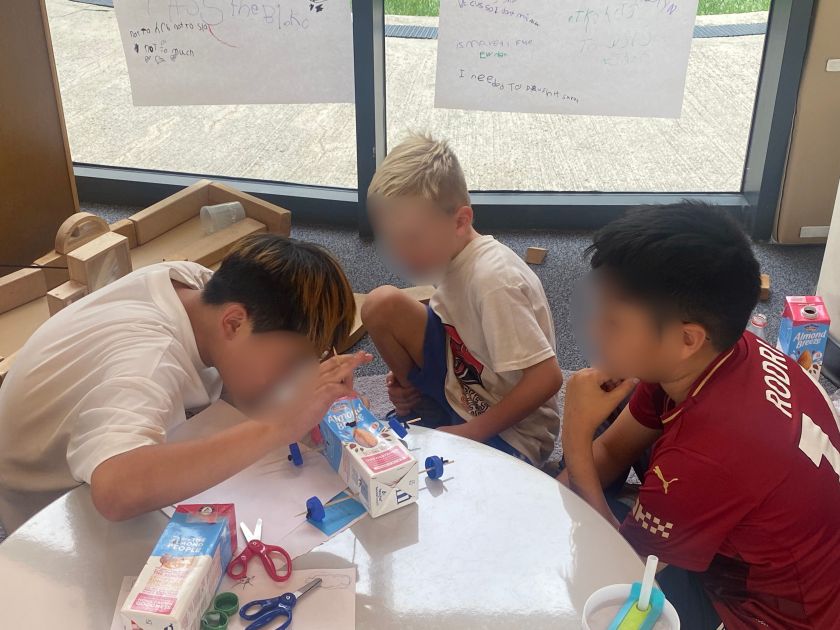
Helping Out a Friend with their Galimoto!
After making our list of materials, students considered what they wanted to make using any of the materials we brainstormed. Students drew out their design for their toy, labeling each part of their design with what recycled item would be used to make it. Some students chose to make cars, others wagons or speedboats. Some got creative with their understanding of force and made a purse, stating that it uses force because you have to pull on it to pick it up. What became clear as students were designing, is that they had a strong understanding of push and pull forces and the different ways their movement can be changed. Students discussed related concepts like direction, speed, and weight when discussing how their object would move.
Finally, students built their creations! They had so much fun putting together their toys, testing out their ideas of how it would move. It was a great celebration of creativity and knowledge.
What? Open inquiry is a purposeful time of our day lasting about 45 minutes, where students engage in a variety of learning engagements that are connected to our learning objectives.
How? Open Inquiry is set-up as stations around the Hub that student’s “sign-up” for. At the beginning of the year, we asked students each day which station they would like to engage in first and then either wrote their name or moved their photo marker to visually represent the sign-up. Towards the middle of the year we introduced students keeping track of their own movement between stations with a personal Open Inquiry checklist. Students know that they do not need to stay at the same station for the entirety of the time, but should be engaged in each activity for an extended period of time, minimum of 15 minutes of engagement to start. The student’s checklist was further modified to include “must-dos” and “can-dos” to allow choice, but also highlight various stations that throughout the week they must attend. A teacher is always present at a “must-do” station to also document which students have engaged in that activity, although primarily it is the child’s job to recognize if they have or have not done the learning engagement yet for the week.
Why? Open Inquiry is really about students being able to explore their interests in connection to a broader theme. It’s also a time where real thoughtful differentiation can occur that meets kids where they are in terms of their readiness level and best methodology for learning. Prior to implementing Open Inquiry in the Hub environment, we would have daily free play time. Although we still incorporate free play periodically throughout the week, allowing students complete choice over any engagements in the space, we found that not only were students going to the same area again and again but many students didn’t know where to go at all. Open inquiry gives students opportunity for discovery, for enrichment in our learning and for being a Risk-taker and trying new things. Since we change the engagements weekly, students have enough time to explore the stations put out and go back to a favorite before they’re ready for a new challenge.
What does this look like in connection to a Unit of Inquiry?
Let’s take a look at what stations could look like for a Unit of Inquiry. Below is what one week of Open Inquiry looked like last year during our Sharing the Planet Unit on Living Things. We were careful to ensure that the learning engagements covered a variety of skill areas both academic and ATLS. With the stations below in additional to learning about the unit students will work on their counting and cardinality, reading/book handling, close observation skills, sorting skills, and fine motor skills.
PYP Sharing the Planet
Central Idea: Caring for living things grows from learning about nature’s cycles and how we depend on each other.
Lines of Inquiry:
Living things and their life cycles (change)
How habitats make it possible for living things to meet their needs (connection)
How humans can take action to protect living things in their environment (responsibility)
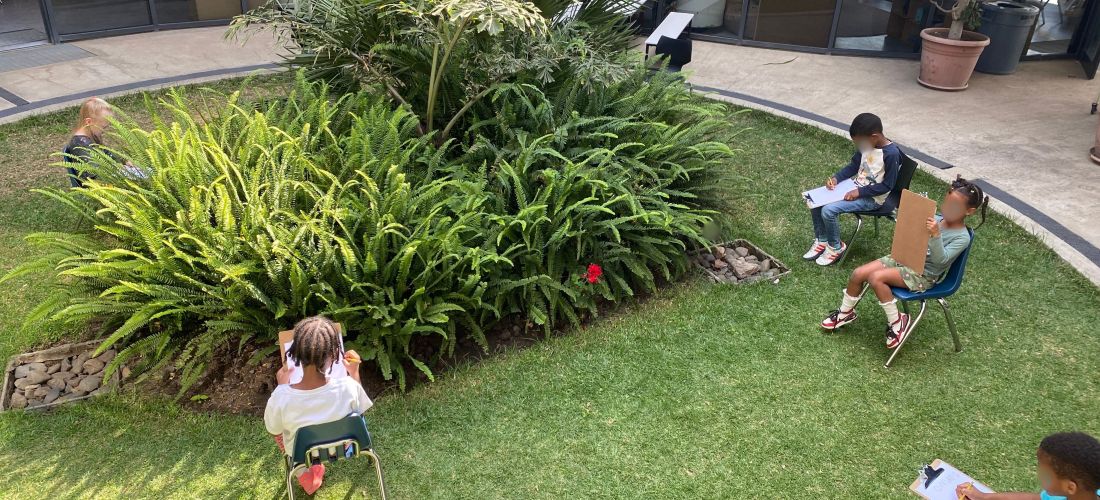
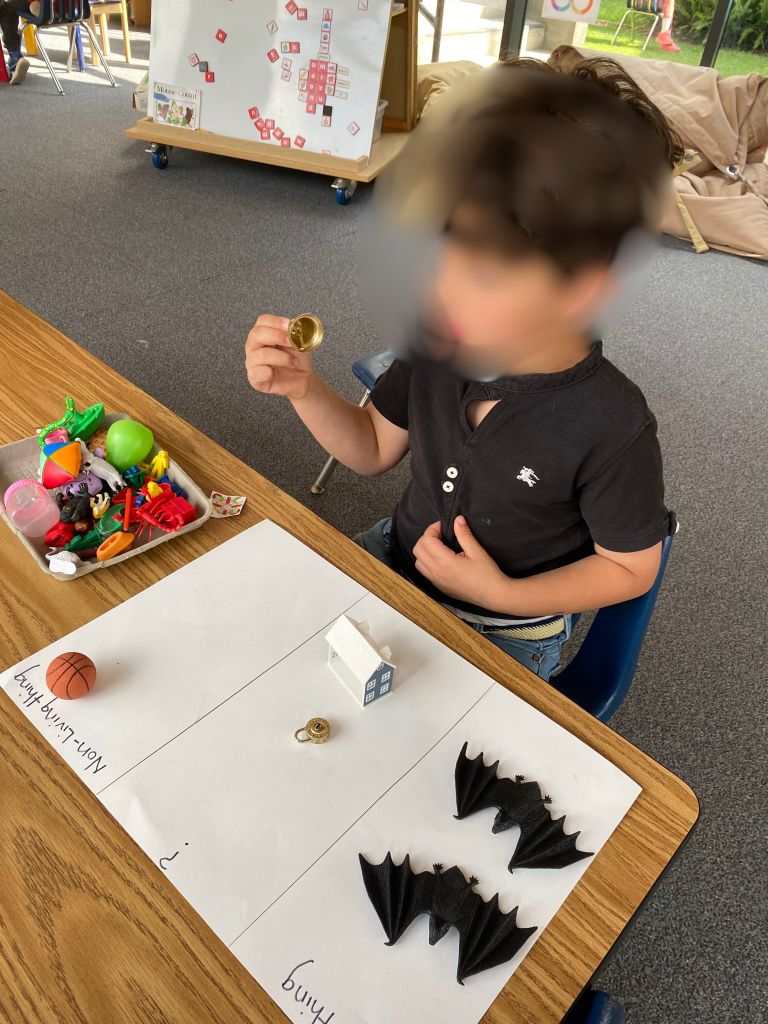
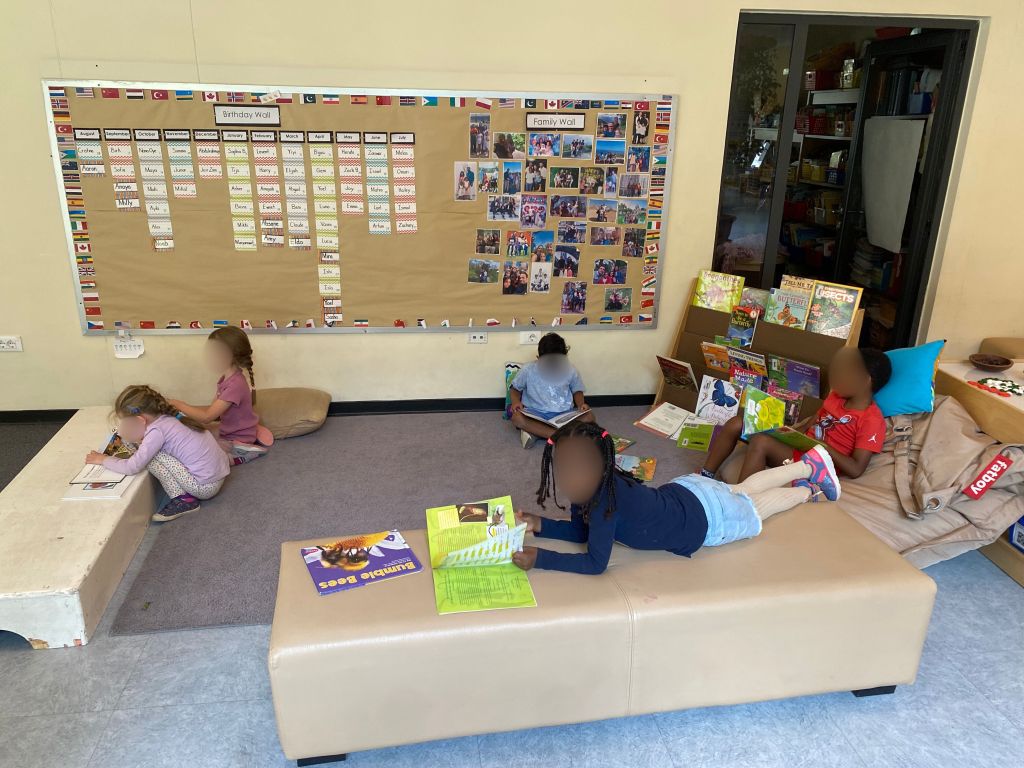
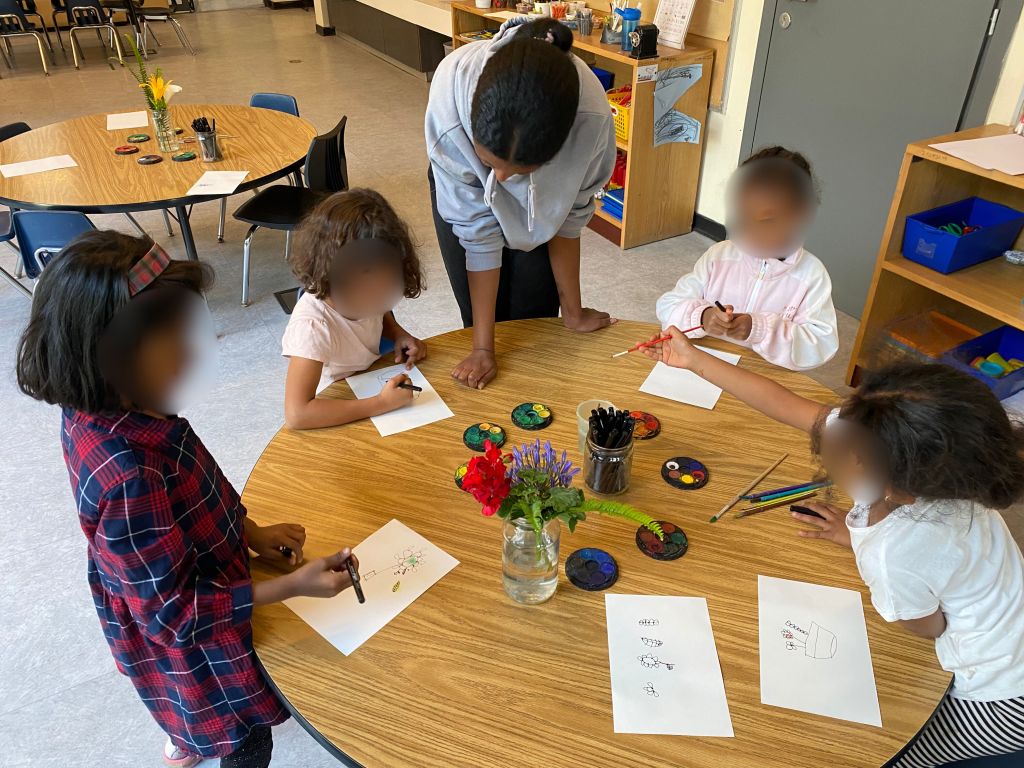
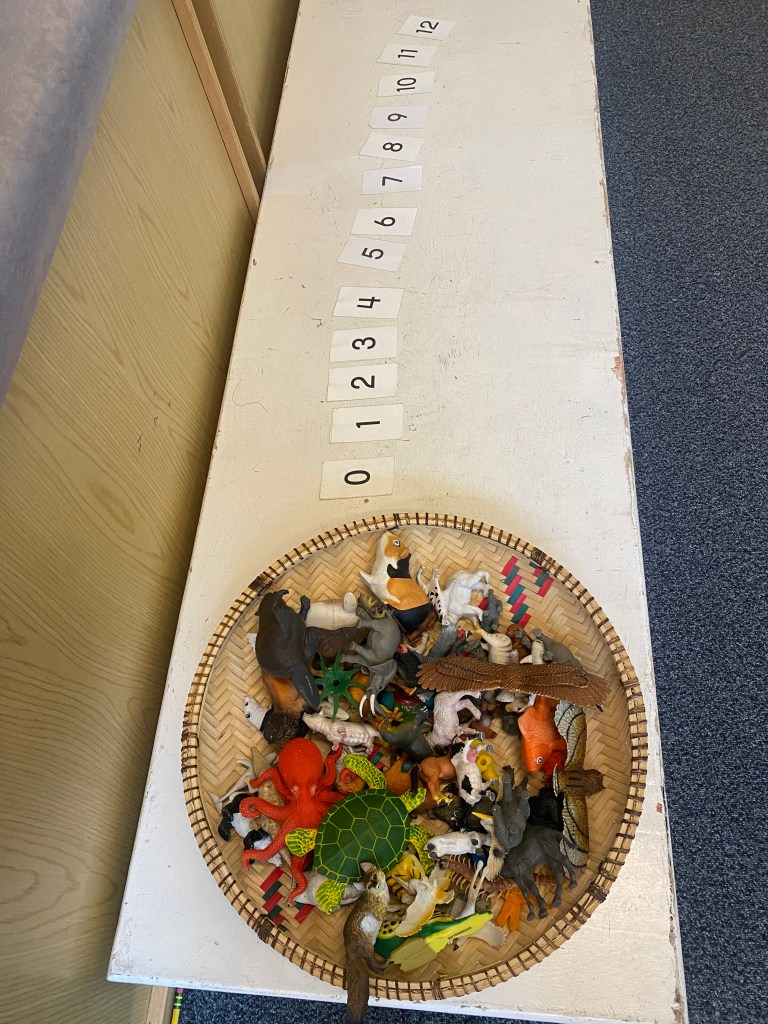
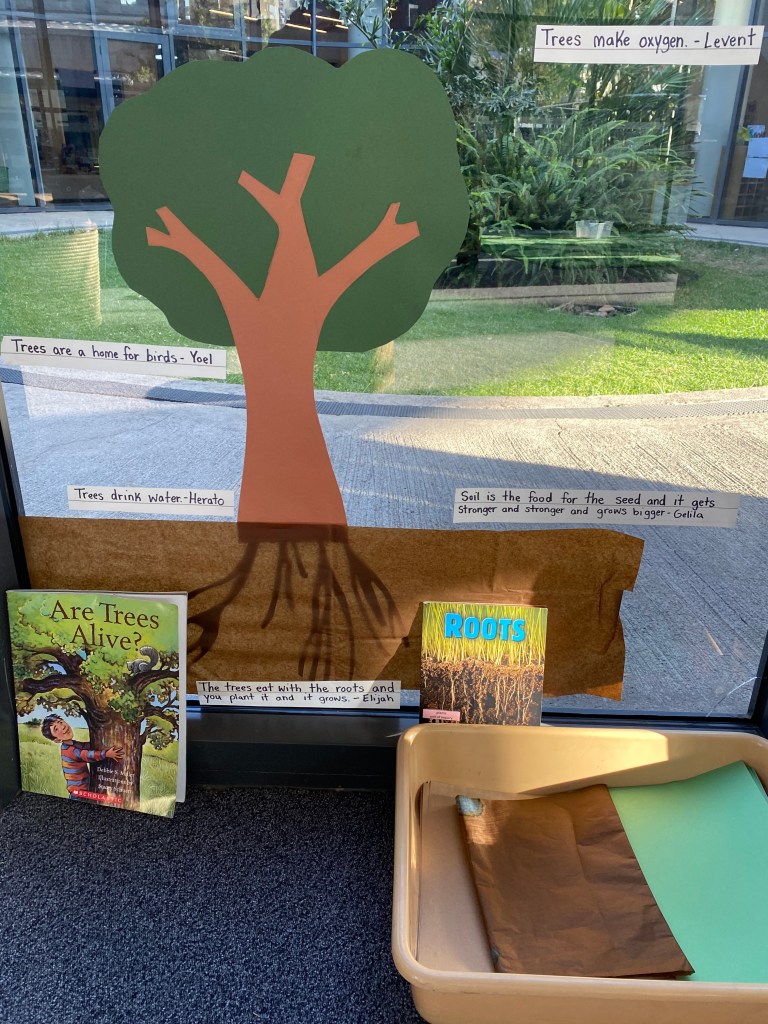
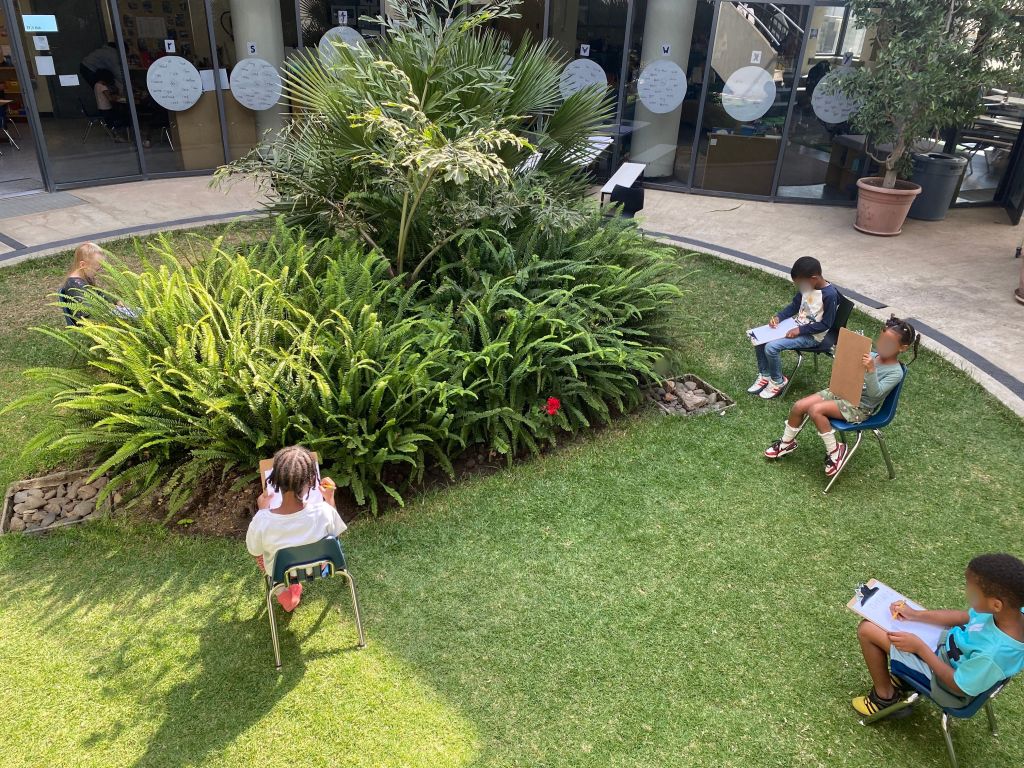
Sorting Living and Non-Living ThingsRead to Self Unit BooksPaint a Living ThingOrder the Animals by Number of LegsExplore if Trees are Alive and Make Your OwnSketch like a Naturalist
In the welcome weeks of the school year, my main goal is to get to know my students. Another goal, is for my students to make the connection that in order to achieve any hopes and dreams they might have for the year, we must create a safe space that encourages risk-taking and accepts mistakes. At the school I currently teach at, we have 5 Core Values: honesty, respect, responsibility, fairness, and compassion. These core values are what students live by to represent the school’s mission. But how do you create a class space where each of these values is the norm?
To start off this mini-unit for the welcome weeks of school, we talked about culture as a class. We brainstormed what we think of when we think of the word culture and came up with a class definition for the word. My classes definition was “traditions and behavior that is passed on within a group of people.” With this definition, we determined that a culture could apply to a smaller group or community, like we have in the classroom. I next wrote up the following 5 statements, each on a separate large sheet paper throughout the room.
1. Write what color a culture of compassion reminds you of and why (use that color!).
2. Draw an image that shows what a culture of respect looks lik
3. Describe a time that you were responsible or saw someone else being responsible.
4. Write a short phrase you would hear in a culture of honesty.
5. Draw a symbol that you believe represents a culture of fairness.
Having the students rotate through these posters in small groups and write down their ideas in this visible thinking exercise really paid off. The students were creative in their responses, had rationale for their ideas, and were open about their experiences. As a wrap-up to this activity, I gave each student a sticky-note. I told them that on that sticky note they were to write down one idea from someone else that they liked from any one of the posters. When we gathered back together as a class, the kids shared the one idea they liked out-loud. Each student then stuck his or her sticky-note on the front board. We used these sticky notes as a tool in helping us build our class essential agreement.
RL.K.9 With prompting and support, compare and contrast the adventures and experiences of characters in familiar stories
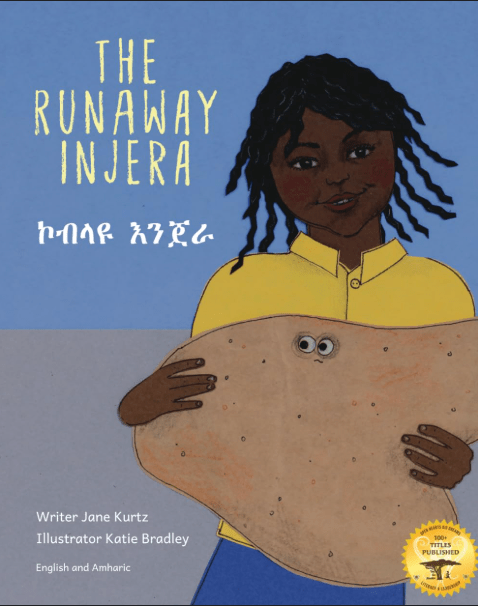
What? First students compared and contrasted the popular fable, “The Gingerbread boy” with a local take on the story, “The Runaway Injera.” After making treats that resembled each story, students again compared and contrasted but this time with their sense of taste.
How? With the holidays approaching, we decided it would be fun to incorporate some different types of texts into our literacy lessons to spark student interest and provide a pathway for other fun holiday activities.
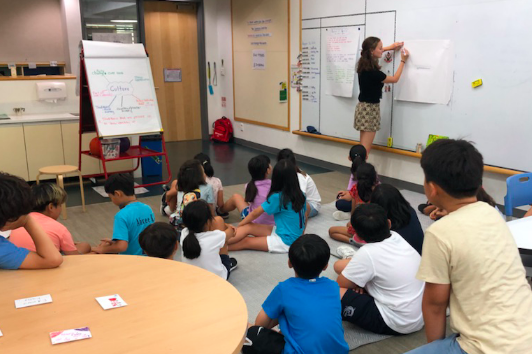
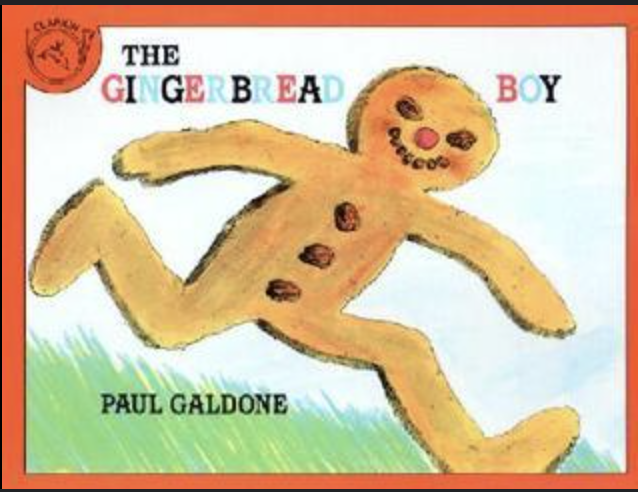
Day 1: First, we read the story “The Gingerbread Boy” by Paul Galdone. After reading the story, on our documentation chart we recorded who the characters were in the story, what the setting was, the problem in the story and the solution in the story. This was particularly interesting as it lead to a student debate on what the solution truly was! Many students said there was no solution because the gingerbread boy got eaten in the end of the school. We talked about how for the gingerbread boy there did not seem to be a solution, but for the fox who got to gobble him up there was a clear solution! This was a natural lead in to discuss how perspective of characters is something to consider when determining a problem and solution.
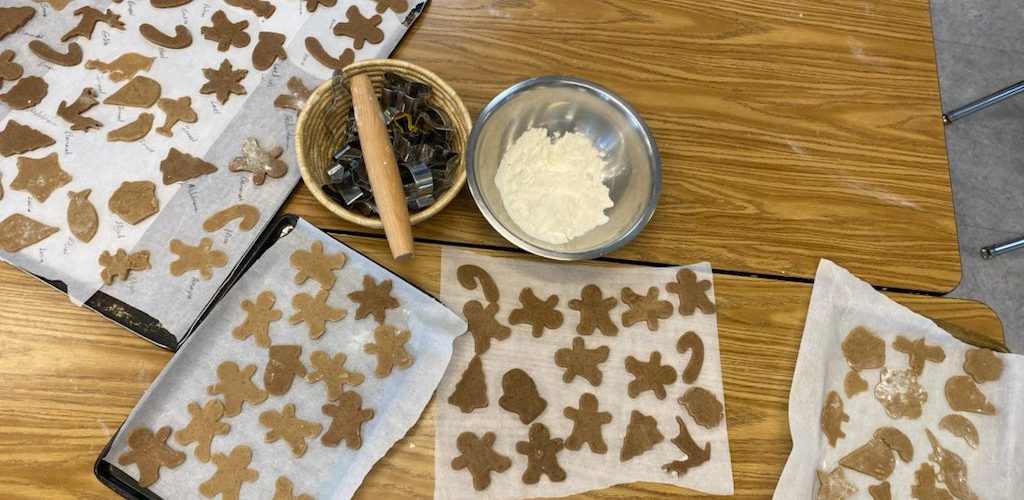
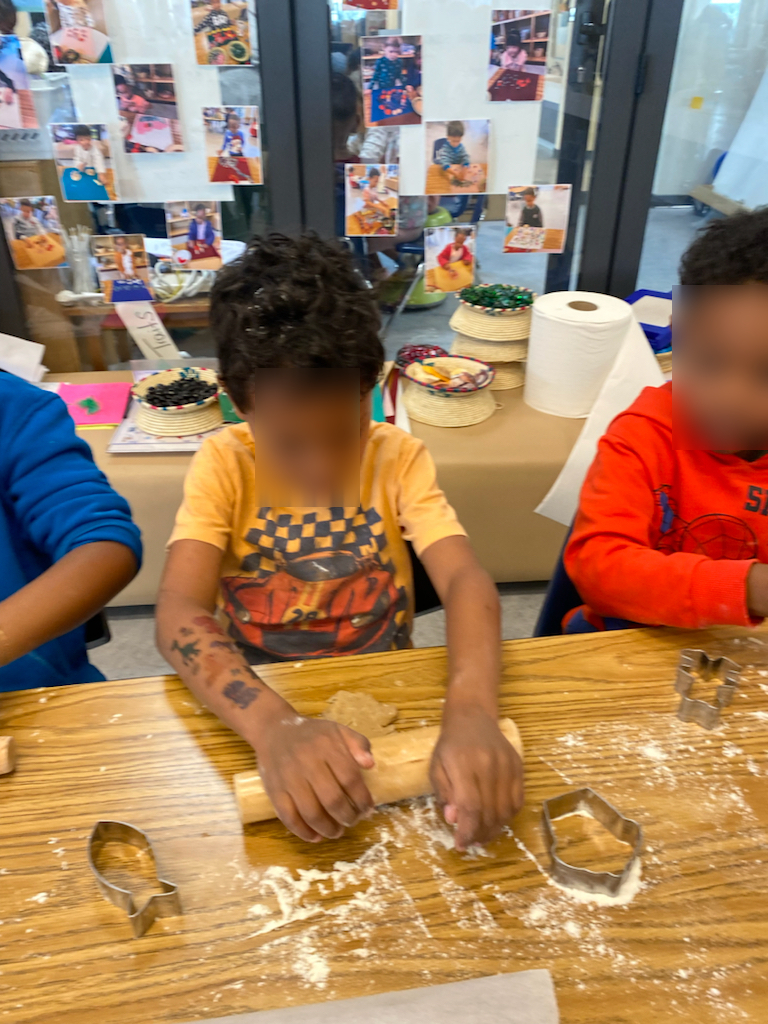
After we read the story, we told the children we were going to make gingerbread cookies! Each child got a chance to participate in part of the process as we needed to make three batches. Once the dough was made, the children discussed the concept of shape and how they were going to form their cookies. Each child got to choose which shape they would make their gingerbread cookie. Once out of the oven in the afternoon, students got to decorate their cookies with frosting and other sweet decorative goodies.
Rolling out our dough with different shapes
Day 2: The next day, we read the story “The Runaway Injera” by Jane Kurtz, who used to live in Ethiopia. We again documented on our classroom documentation sheet the characters of the story, the setting, the problem and solution. Students noticed that there were many similarities in the problem and solution in this story to the gingerbread boy story! However, the characters and the setting were not the same. This was a good start for our independent work follow-up.
That afternoon, students again had the opportunity to be hands-on and make their own treat. This time, students used injera bread to shape their own mini injeras. They stated that injera is a round shape so they chose the circle cutters to cut their own pieces. Each student decorated their own injera with Ethiopian spices.
Day 3: The final day of this learning engagement began with students completing an independent writing activity in their Story Workshop notebooks to “compare and contrast” the two stories. On their book, we glued a photo of each story at the top and drew a line down the middle for students to have a simple organizer to share their thinking. Students first wrote everything that was the same in a list format. Underneath on the chart they wrote everything they noticed that was different in the two stories. To differentiate this lesson, students could either write a word to go with each bullet point or they could write a complete sentence for each bullet point.
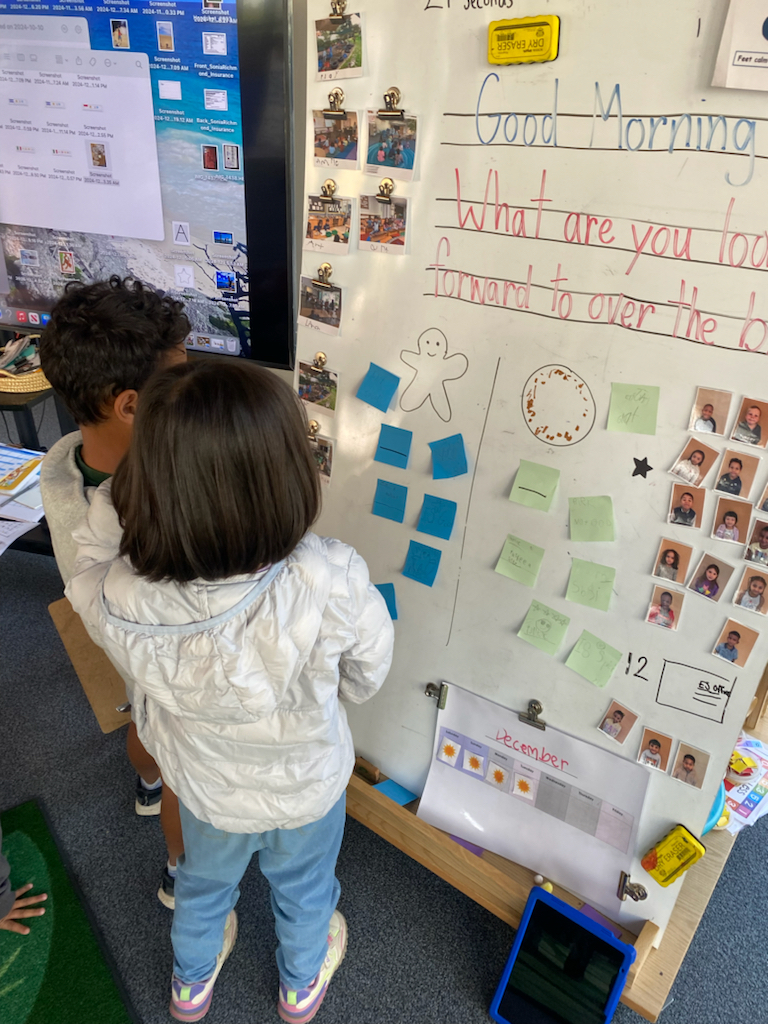
We ended our day with a taste testing party! Students received their cookie and their mini injera and we sat together for the party to try each treat. We told the children to carefully taste each, and think closely about how they would describe what they were tasting. What words would you use to describe the cookie? What about the injera? Would you use the same words or different words? At closing circle students came with their words in mind! Each child was given two sticky notes and told to write down one word to describe the cookie and one word to describe the injera. We created a whole group chart comparing and contrasting what each treat tasted like!
Students put their sticky note on our whole group chart. The blue sticky notes described their cookie and the green sticky notes described their injera.
Why? To really understand a new concept, students benefit from multiple encounters with that topic in different contexts. Although the standard for EY5 Literacy is for students to be able to compare and contrast stories, students will gain a richer understanding of comparing and contrasting if they have opportunities to compare and contrast other things. This lesson gave this opportunity, as students had a body to consider how stories can be the same or different, but also see how a similar model could be used to discuss similarities and differences for just about anything. Not only this, but students had such an enjoyable time completing immerse themselves in this fun, yummy, hands-on learning just in time for the holidays.
Central Idea: Awareness of weather patterns inspires people to create solutions for living safely and comfortably in different places.
Lines of Inquiry:
Patterns in weather in different places (form)
How people design solutions to solve problems (causation)
How people prepare for and respond to weather (responsibility)
What? Students explore their own identity through reflecting on memorable weather experiences and how they needed to respond to different types of weather.
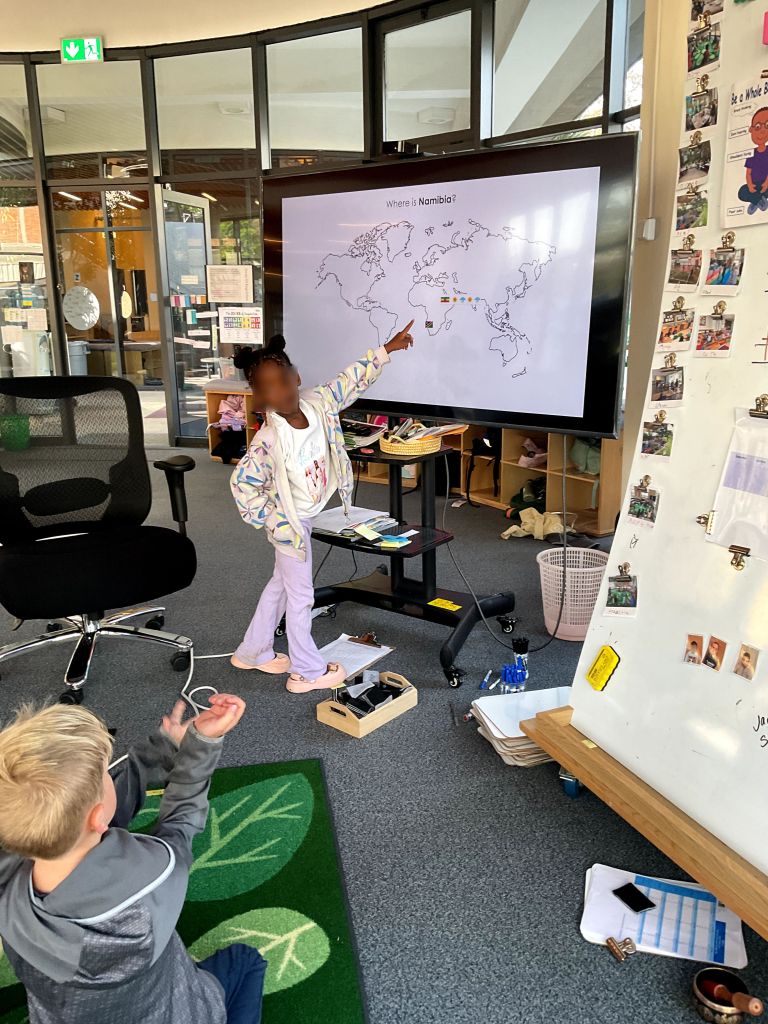
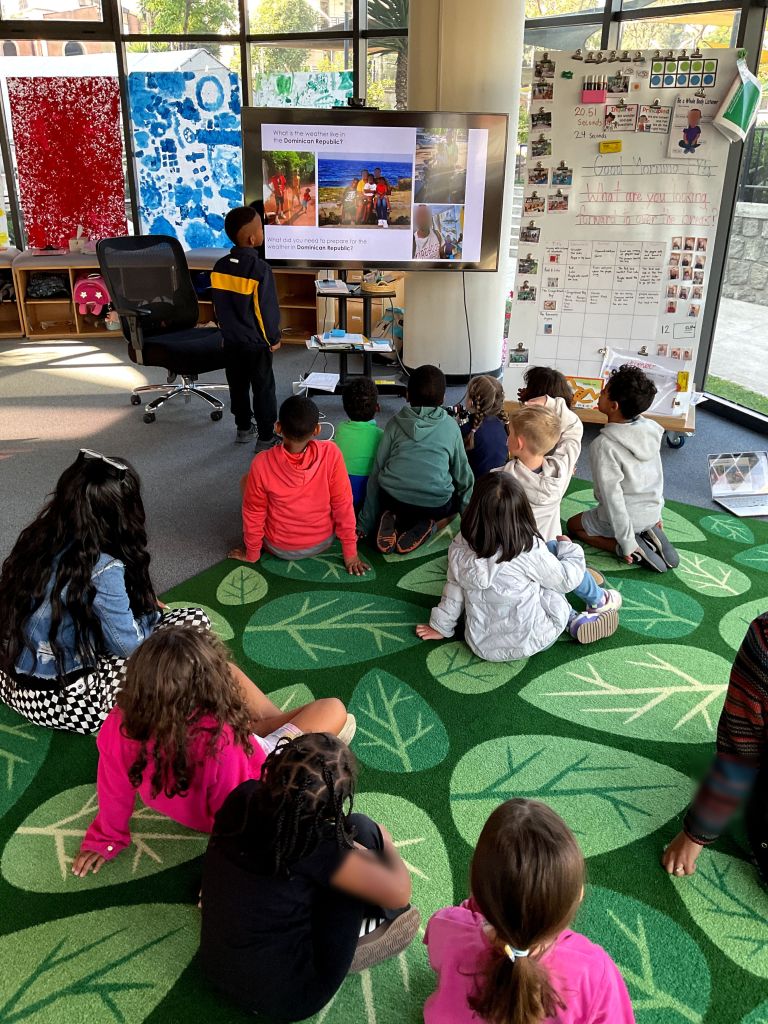
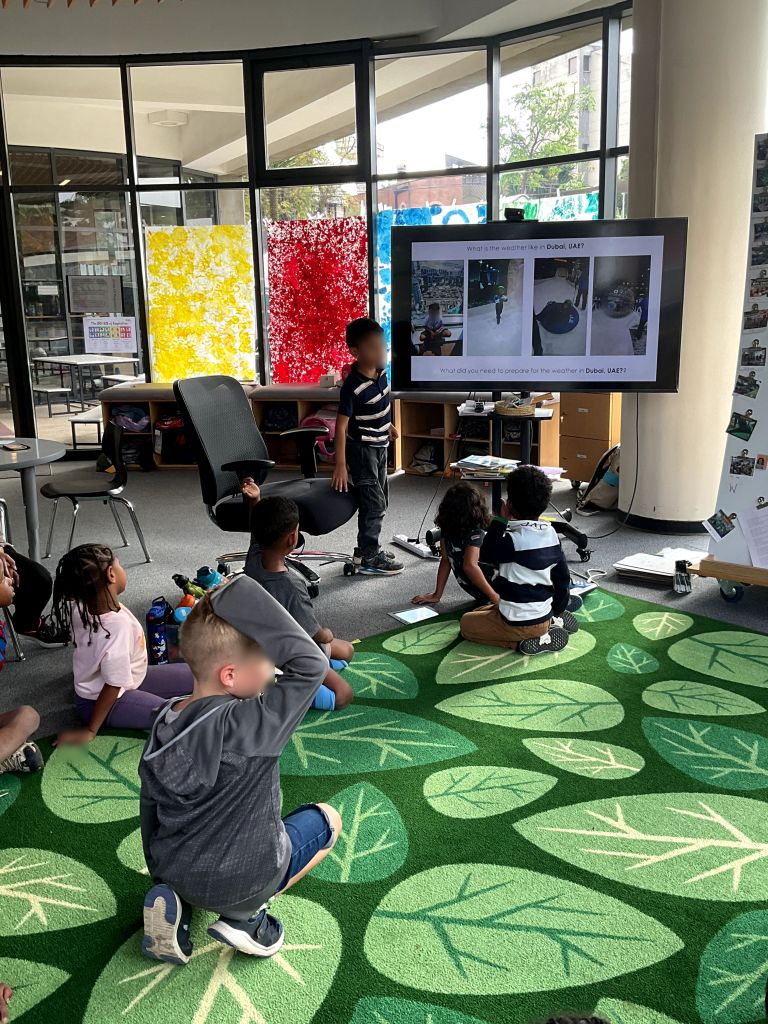
How? This project began because of a student inquiry in the response to the question, “is the weather always the same in every country?” Students and families were asked to email 3-5 photos of their child experiencing weather in a different country to the teacher. It could be a country the child used to live in or a country the child had visited on vacation. Once I received the photos, I put together a basic “presentation” for the child (although if time permits and students have the tech skills, students could do this piece themselves.) Each child then shared about their weather experience, first showing where the country was on a map of the world and then sharing the photos. For the share, children discussed their experience with weather and any seasonal patterns they know of in that country and. how they needed to prepare of the type of weather they were sharing about.
Here is the outline for the presentation-
1. Child shares where their country is on a map
2. Child shares what the weather was like in the country when they were there and what they needed to prepare for that type of weather.
3. Presenter answers questions from classmates.
Why? Allowing the children to “take us” all over the world with this fun presentation, provided an opportunity for each child to share a place and a memory vastly important to them. Identity was explored further when each child got to both ask and answer questions from their classmates about their experiences, allowing us to learn new things about one another. Since many children had never experienced a different weather type than a sunny and rainy weather pattern, this provided an opportunity for students to be knowledgable and learn from each other. We practiced our listening skills, question asking skills, and presentation skills, all while being Inquirers about each other’s lives and why different weather patterns exist.
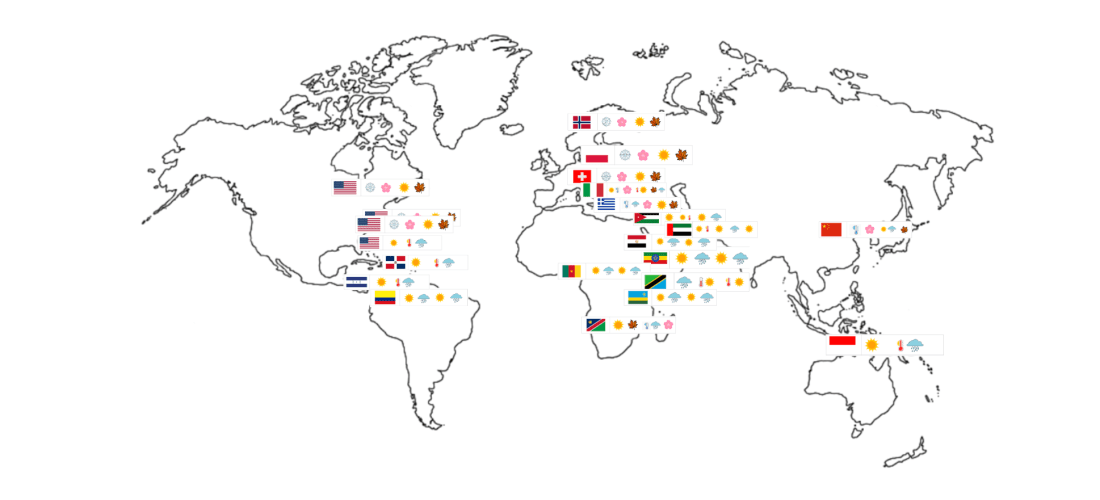
Our final weather patterns map after each child had shared their weather experiences. This map was teacher created throughout the unit using the data students shared about their weather experiences in each country.
Additional Note:
Incorporating weather into a Who We Are unit was both a challenge and an eye-opening experience for me as an educator. This unit came as a review of our Science Curriculum to incorporate the Next Generation Science Standards, a product of robust conversation and questioning as to its fit. Although there are still much elements on How the World Works in this unit, it was clear from teaching it that our experiences with weather do indeed play a huge part in how we grow up and who we become.
Central Idea: The Form of Material Impacts It’s Function
Lines of Inquiry:
The properties of materials (form)
The way materials are used (purpose)
Design (function)
What? Students have been inquiring into the properties of materials using their 5 senses for observation and the scientific process to test the properties of different materials. Students now have the opportunity to pick one type of material to research in depth during an immersive lab experience
How? Welcome to the plastic Lab! This is what our sign read to greet parents for our Celebration of Learning concluding our investigation and lab experience. The children walked their parents through their process from beginning to end with each activity we did in lab. Here’s the first 3 days of our process as a lab group:
Day 1: Opening Question: What do we use plastic for? Why? After discussing, children explore everyday household plastic objects including shampoo bottles, yogurt containers, water bottles, and classroom toys. Children use magnify classes to look closely and think about what they can learn from each of their senses. Discussion: What did you notice about plastic? To conclude, children are given a lab notebook. On the first page they wrote down a question they had about plastic.
Day 2: To begin, I showed students a picture of a tortoise (we several at school that roam the campus), but you could use any picture that is fun and relatable to your students. Opening Question: How would you describe this picture of a tortoise? I wrote down the words students were using to describe the tortoise, then we discussed that these were the characteristics of a tortoise. The children already knew this word characteristics because of our previous unit Who We Are. I then showed students some of the plastic they were looking at yesterday and asked them. What are all the words you could use to describe plastic? I gave my students each a few sticky notes and they wrote down as many words as they could with one word per sticky notes. We put up all the words on the board and I told students that because plastic is not a living thing like a tortoise, these words are all called the properties of plastic.
Day 3: Opening Question: Why do you think we produce plastic? This opening question was also one of my students’ inquiry questions from the first day! I showed them a collection of images of plastic items before allowing them answer the question in a group discussion. Students said anything from, “to make toys”, to “because you make anything out of it!” I showed them a list of words they had came up with from the previous day and read that list to them- hard, soft, pointy, strong, smooth, etc. Do you know what opposites are? I asked them. Some students did! A lot of the words my students came up with were opposites which we found interesting, which is why plastic is so unique and ultimately why plastic was produced. We read a chapter in the book, Plastic, about Alexander Parkes, the creator of plastic and how and why he made this material.
Drawing and Writing What We Think Will Happen During an Experiment with Plastic
Why? Students are naturally curious about what they use, and observe in their everyday life. Since all students got to choose which lab group they wanted to go into for this part of our unit, students were motivated and asked so many great questions which I used to move this unit along and hit on each line of inquiry. Our celebration of learning was a good opportunities to see which activities students had liked the best. Student rushed to show their parents how to fuse plastic beads together and were proud of their overall plastic designs, two of the activities we did later in this unit. Since this unit was full of hands-on activities and ended in a product students were proud of, they gained valuable collaboration, organization, and presentation skills.