Comparing and Contrasting Stories- Holiday Fun!

Grade K-2, Literacy

Common Core Reading Literature


RL.K.9
With prompting and support, compare and contrast the adventures and experiences of characters in familiar stories

What? First students compared and contrasted the popular fable, “The Gingerbread boy” with a local take on the story, “The Runaway Injera.” After making treats that resembled each story, students again compared and contrasted but this time with their sense of taste.

How? With the holidays approaching, we decided it would be fun to incorporate some different types of texts into our literacy lessons to spark student interest and provide a pathway for other fun holiday activities.

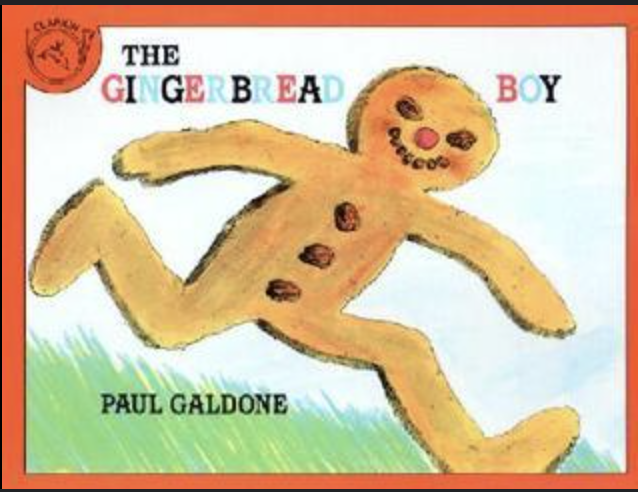
Day 1: First, we read the story “The Gingerbread Boy” by Paul Galdone. After reading the story, on our documentation chart we recorded who the characters were in the story, what the setting was, the problem in the story and the solution in the story. This was particularly interesting as it lead to a student debate on what the solution truly was! Many students said there was no solution because the gingerbread boy got eaten in the end of the school. We talked about how for the gingerbread boy there did not seem to be a solution, but for the fox who got to gobble him up there was a clear solution! This was a natural lead in to discuss how perspective of characters is something to consider when determining a problem and solution.

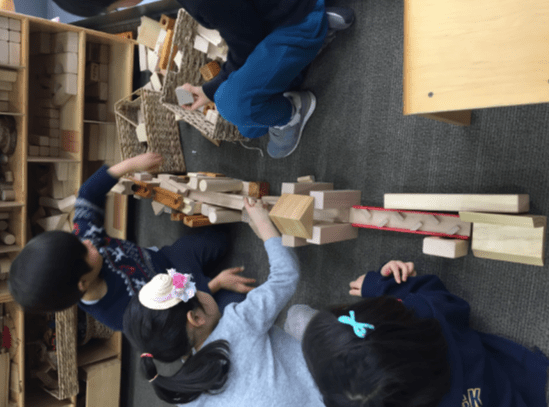
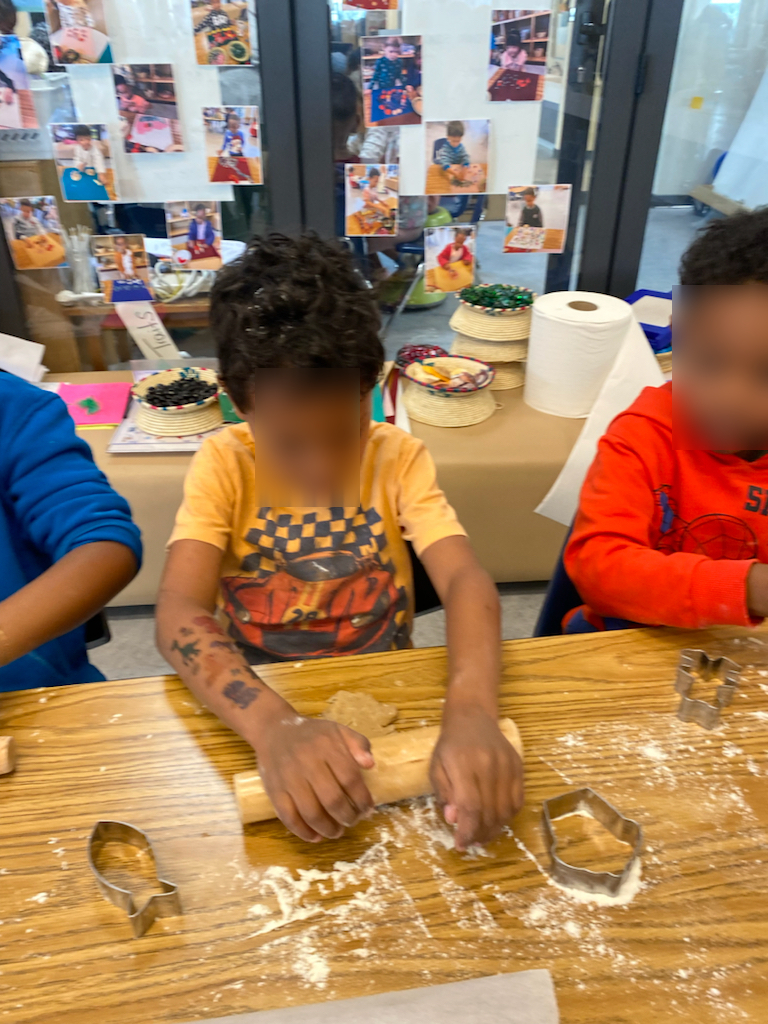
After we read the story, we told the children we were going to make gingerbread cookies! Each child got a chance to participate in part of the process as we needed to make three batches. Once the dough was made, the children discussed the concept of shape and how they were going to form their cookies. Each child got to choose which shape they would make their gingerbread cookie. Once out of the oven in the afternoon, students got to decorate their cookies with frosting and other sweet decorative goodies.

Rolling out our dough with different shapes

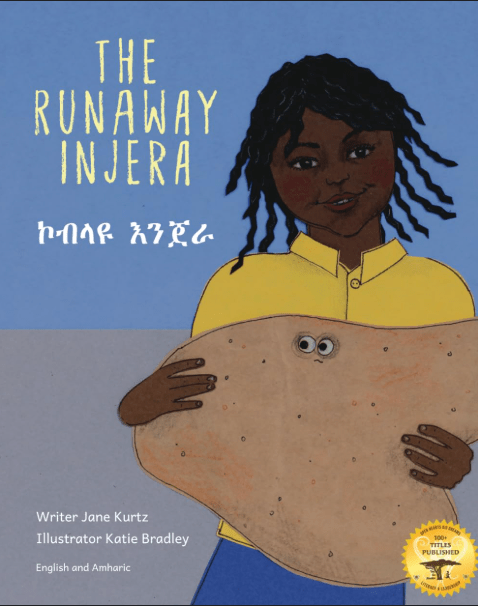
Day 2: The next day, we read the story “The Runaway Injera” by Jane Kurtz, who used to live in Ethiopia. We again documented on our classroom documentation sheet the characters of the story, the setting, the problem and solution. Students noticed that there were many similarities in the problem and solution in this story to the gingerbread boy story! However, the characters and the setting were not the same. This was a good start for our independent work follow-up.

That afternoon, students again had the opportunity to be hands-on and make their own treat. This time, students used injera bread to shape their own mini injeras. They stated that injera is a round shape so they chose the circle cutters to cut their own pieces. Each student decorated their own injera with Ethiopian spices.

Day 3: The final day of this learning engagement began with students completing an independent writing activity in their Story Workshop notebooks to “compare and contrast” the two stories. On their book, we glued a photo of each story at the top and drew a line down the middle for students to have a simple organizer to share their thinking. Students first wrote everything that was the same in a list format. Underneath on the chart they wrote everything they noticed that was different in the two stories. To differentiate this lesson, students could either write a word to go with each bullet point or they could write a complete sentence for each bullet point.

We ended our day with a taste testing party! Students received their cookie and their mini injera and we sat together for the party to try each treat. We told the children to carefully taste each, and think closely about how they would describe what they were tasting. What words would you use to describe the cookie? What about the injera? Would you use the same words or different words? At closing circle students came with their words in mind! Each child was given two sticky notes and told to write down one word to describe the cookie and one word to describe the injera. We created a whole group chart comparing and contrasting what each treat tasted like!

Students put their sticky note on our whole group chart. The blue sticky notes described their cookie and the green sticky notes described their injera.

Why? To really understand a new concept, students benefit from multiple encounters with that topic in different contexts. Although the standard for EY5 Literacy is for students to be able to compare and contrast stories, students will gain a richer understanding of comparing and contrasting if they have opportunities to compare and contrast other things. This lesson gave this opportunity, as students had a body to consider how stories can be the same or different, but also see how a similar model could be used to discuss similarities and differences for just about anything. Not only this, but students had such an enjoyable time completing immerse themselves in this fun, yummy, hands-on learning just in time for the holidays.

Exploring an Artist’s Passion

Grade 3-5, How We Express Ourselves, Literacy, Social Studies

PYP How We Express Ourselves

Central Idea: Imagination and creativity are powerful tools for extending our ability to think and create

Line of Inquiry: The ways in which we inspire imagination

What: We read several books by popular children’s writer David Weisner including Sector 7 and Tuesday. David Weisner writes mainly in pictures instead of words. After reading these books, I had students look through David Weisner’s online blog to determine what in his life inspired him to create such unique stories.

Copyright David Wiesner

How: I did several whole class read alouds of David Weisners work so student were familiar with his unique way of writing and illustrating. I next had students investigate on his blog where these ideas came from. Students used their macbooks to research and read any of the posts. As the read, they wrote down on sticky notes any life experiences that Weisner references in his blog that sparked the imagination for his picture books. There were many clear examples in his blog where he references an event from his childhood or experience as a young adult.

Why: The most creative works are routed in the identities of the people who created them. In order for my students to be creative, they must understand that individuals are inspired from their passions and their histories.

Haikus as a Stack

Literacy

One day, I was asked to substitute as the homeroom teacher in one of the 4th grade classrooms I intern taught in. The regular homeroom teacher provided me with the lessons he was planning on doing that day including two power-point presentations; one on Haikus and one on similies. Each power-point conveyed information to the students in a lecture format with limited student engagement.

I decided to revamp these lessons, giving my students credit for the knowledge they already knew. Instead of following these plans, I used the content as guidelines for an inquiry based approach. Here is the first lesson I did on Haikus.

I put these three poems up on the board, and asked my students:

What do the following poems have in common?

Power-Point Slide on Haikus

Student Answers:

  • They’re about nature
  • I think they might be Haikus
  • The first and third poems are Haikus because they follow 5-7-5 syllable pattern
  • Could they all be Haikus even if they have a different syllable pattern?
  • They have to do with the seasons
  • They have to do with movement
  • I think the poets might be European looking at their names?
  • I know Haikus are Asian, are they Chinese?
  • The poets are Japanese

My students came up with the same ideas that were on the bulleted list in the power-point and more. They also had the opportunity to analyze famous poems that will likely emerge again throughout their education and life. This was a powerful moment for me as a first year PYP teacher, as I proved that showing students stacks of texts and having them analyze the content of st

The Purpose of Poetry

Grade 3-5, Literacy

Teachers often spend many lessons having students write various styles of poems which follow a specific theme or style of writing. Students are taught a kind of poem, how to write it, and maybe some literary devices to help them along the way, without always understanding the why people write poetry. What is poetry really?

My mom is a poet, and I once had my students Skype her so that she could give a reading of some of her poems. My students had never heard a poet read before and so I wanted to give them some insight on the passion behind poetry, the tone of a reader, and what inspires someone to write. I did a simple exercise with my students in preparation for this Skype call, which I believe teaches the purpose of writing poetry.

Skype Call to Mom!

First, I had my students look at a picture of Piute Creek, a location in Yosemite National Park. An author who inspires my mother by the name of Gary Snyder has a poem titled Piute Creek written about this location. I had my students close their eyes for a minute and picture themselves there. What would you see? smell? be doing? Be in that picture. Next, I read my students Gary Snyder’s poem. This allowed my students to understand how feelings and experiences could be put into words.

Next, I read my students a poem by Robert Frost, The Pasture. This time I did the opposite. I read the poem first, and then after asked my students to tell me what a picture of this poem might look like. If I had had more time, perhaps I would have had my students each draw a picture, or interpretation of this poem. The takeaway from this exercise was that poetry is designed to bring out experiences, to tell stories, and to fill a readers head with imagery.

My students were inspired to find pictures from home or take pictures at home of something that inspires them to write poetry about as a next step. This lesson also directly connected to our unit of inquiry on imagination and inspiration.

“How To” Writing Through Play

Grade K-2, Literacy

Children find meaning in, in the same way that adults only want to write about something they enjoy. And what do Kinder students love to do? Play! Therefore, teaching kids writing through play seemed like a natural fit when I wanted to teach them “How-To” writing. Here is the 2 Day Outline:

Day 1, PLAY: Before I began this lesson, I arranged different toys around the classroom for my students to use during a play session including dominos, blocks, tubes and a marble run. Since this lesson was in connection to these Kinder student’s unit on Force and Motion, I made sure all these toys could somehow be used to demonstrate this idea.

I started this lesson with the whole class, reviewing words and ideas that the students already knew about Force and Motion. The kids were great, talking about push and pull and friction and how these work with objects. Next, I broke the students into small groups and assigned each group a toy to play with. I told the kids that their group’s job was to build something that demonstrated what they knew about Force and Motion. I told them I wanted them to consider what the beginning of their project was going to look like, what the middle would look like and how they would know they were done with their creation. Below is a sequence of what some of their play looked like.

During their play time, I ran around like a crazy teacher taking as many pictures as possible of each of the 4 groups to use during the writing activity on day 2.

Day 2, Sequence & Write: For day 2, I made laminated sequence cards for each group including one picture from the beginning, one picture from the middle, and one picture from the end of their play. Each group’s job was to put these cards in order in how they believed the steps in how they made their structure went. I went around to each group and asked the kids questions in connection to their sequencing- “why did you put this card first?” “Can you tell me using the cards how I can build the tower you made?”

Once I had checked in with a group successfully, I gave each student in that group a folded piece of paper as a book. The kids turned this folded sheet into their own “How To” book. They completed a page 1 for the beginning, a page 2 for the middle and a page 3 for the end of their play project. Each page had a picture and writing in the form of words or complete sentences depending on the student’s literacy level. Once done, I had the kids make a title page, getting inspiration by looking at a few picture books we had around the classroom.

How to Teach Writing:”Beginning, Middle, and End”

At-Home Learning, Grade K-2, Literacy

All stories we read have a beginning, middle, and end. Yet, not all stories our students write are so lucky. Maybe it’s a missing introduction to text’s characters, or maybe it’s no conclusion to the main event. It can be difficult for many adults to write concisely with clear sequencing, therefore teaching a 6 year old how to write a complete concise story may seem daunting. But there’s an easy way you can get started, and it all begins with pulling out a picture book from your shelf.

For this activity, it will be helpful to have a picture book that your child is not too familiar with, as the goal is to access your child’s creative story-telling side. If the picture book is too familiar, your child may simply quote the book when completing the activity. (This happened when I tried this activity out on my student . . .:) )

Activity: Picture Storyteller
Grades: K-2
Materials: pencil, lined paper, one picture book, extra blank piece of paper

Pull out the picture book and explain to your child that today she/he will be writing a story using the pictures from the book. Ask your child which picture from the first 1-4 pages of the book your child would like to use as the beginning picture to her/his story. Once your child picks one of the books pictures for the “beginning” ask specifically what the beginning of the story is for? You’ll likely get answers along the lines of: giving the settling, introducing characters, talking about time, etc. Help your child define what it means to write the beginning of the story. Next, take your blank piece of paper and cover the words on the page your child has selected so that the only part viewable is the picture. Tell your child to write 1-2 sentences (depending on your child’s comfort level with writing) that tell a beginning using the picture from the text. If the text is unfamiliar to your child there should be a great deal of creativity involved, such as naming characters, picking a location, or coming up with an interesting scenario based on the clues from the illustration.

For the “middle” of your child’s story, go through a similar process. Allow your child to pick any page they want from the center of the picture book. It can be any picture that attracts their attention. Discuss what the middle of a book is for and have your child write 1-2 sentences shaping the middle part of their story, while you cover the text with the blank piece of paper. The middle of the story should have an event. For 1st Grade, it is completely fine if the event is something as simple as the characters going on a fishing trip together. There should be some detail about what happens and word choice signaling that this event is in sequence and is indeed the middle of the story.

The ending of the story comes from your child picking one of the last 1-4 pages of the story to write about. This might depend on the book which pictures you want to allow your child to use, but generally any page near the end of the text could be used for a thoughtful, creative ending. Make sure to specifically ask your child what the ending of the book is for and cover the text! An ending does not just have the words “the end,” it includes closure to the events in the story. Something as simple as, the family returned home after a long day fishing, makes it clear that the event has ended and thus the story is over.

Have fun with this activity and feel free to modify for varying ages and degrees of difficulty! These suggestions are based off of a 1st Grade Writing level and the standard, W.1.3 of Common Core for writing narratives.

How to use what you already have at home to teach!

At-Home Learning, Grade K-2, Literacy, Math

COVID has brought about unprecedented challenges to parents across the globe. One of the largest challenges and areas of debate has been the current role and duty of parents as homeschool teachers for their children. Every school district has been enacting different policies and routines for students to return to school safely, and every child has been put in a unique situation out of their control for how learning will take place this year. I am not a parent, and therefore I cannot frame a post writing from this perspective. I am baffled by how much this is to juggle. That’s why I decided to create this section on my webpage, offering advice, lessons, and tips to current parents struggling to find ideas for easy, hands-on, supplemental activities for their little ones at home. Preschool- 2nd grade is a critical time for development of baseline academic skills! I hope these posts can be helpful 🙂

As a certified elementary and special educator, currently homeschooling a 1st grader and preschooler, my goal is to post lesson ideas that are simple, logical, hands-on and play based for inspiring minds away from the formal classroom. This first post focuses on using things you already have at home to teach academic content more creatively, in a way that will excite your little learner.

  1. Addition and Subtraction with Toys

When I told my 1st Grade student last week that it was time to work on some subtraction she groaned. “But I want to keep making bracelets” she countered. “Okay!” I said, “bring your bracelet stuff with you!” Learning addition and subtraction is already a part of your child’s everyday life, so look for ways you can use it 🙂 Beads are great because your child can easily count out and count on. I gave her subtraction problems and she counted out how many beads she needed to start with. 14-3= meant starting with 14. Since all her beads snapped together, she was quick to note that she needed to use counters that were all the same size to make it easier to count correctly. Each time she removed beads she was able to easily count the remainders. Also since her bead set had the unique feature of snapping together, we were able to end our play time by making groups of 2 out of our 20 beads. She discovered that 10 groups of 2 beads make 20 beads total. Nothing wrong with a little preview of multiplication in 1st Grade! We used her beads for subtraction problems between 1-20, but you could do the same thing for addition with your Kindergartener or multiplication with your Third grader, especially if you have a bead set that snaps together.

Don’t have beads at home? Don’t worry! Beads are simply what I used because it was of my student’s immediate interest. Maybe your child has a dog set at home with 20 dogs. Play doghouse and make it a game- Oh no, 6 dogs ran away, how many dogs are left at the house? Or to have your child practice subtraction by counting up- oh no! There are only 14 dogs at the house? How many are missing!! We used to have 20 dogs! Turning learning into a mystery or using hands-on materials is what kids LOVE and is the base to inquiry-based hands on learning techniques.

Other way to use toys as a counter-

  • Marbles (how many of my 17 marbles went down the marble run?- subtraction/. How many green marbles are there?- Number sense/. How many total marbles are there if there are 3 pink marbles and 4 blue marbles?- addition.)
  • Dominos (Have your child pick the a domino. Use the 2 numbers on the domino to practice addition or subtraction. Make it a game and see who can do the most number of domino subtraction problems in 1 minute!)

2. Transform Reading one of your child’s favorite books into a Sight Word Scavenger Hunt!

Not all kids love to read, but most kids at least have one book that they enjoy for one reason or another. Instead of introducing a new book to your child of which he or she has no interest in, instead use a book your child LOVES in a new way. (This is not suggesting you shouldn’t introduce new texts to your child, OF COURSE, you should be doing that! Instead this is suggesting that for certain literacy concepts, questions, or writing skills, it could be better to use a text your child already enjoys)

One thing I did with my 1st Grade Student is we used a sheet of common 1st Grade Sight words that she needed to know to go on a book scaveneger hunt. I read one of her favorite picture books to her and she sat with the list actively looking for words that matched what she had on her paper. (I had to help her a little to find all the words!) Once we found a word that matched we stopped where we were in the book. I asked her to repeat the word, and spell it looking at the spelling in the text. She then wrote down the word in her notebook. (Later in the year I would have had her also right down the phrase it came from, but we aren’t there yet). We then circled the word on her list so that we could keep track of how many words we found! By the end of the book, we had found, read, written, and circled 16 sight words- a huge accomplishment.

Other activities with your child’s favorite picture book-

  • Read through pictures! Instead of reading the words to your child, have your child read the pictures to you. This will create a whole new interpretation of the text, and you both might discover something about the story you never knew existed. Make sure to ask clarifying questions to your child about the characters, setting, and major events based on what he or she “reads.” When you’re done reading the pictures, go back through the text together and discuss how the pictures compare to the words on the text. Ask your child- Why do you think the author included certain ideas in the pictures?
  • Question brainstorm- Read your child their favorite story but go slow, stopping on each page. Ask your child to come up with as many questions they can about the story on each page (or each full-page spread). You could do this for the whole book, or only a couple favorite pages. Once you’re done with the book, go back through and see what questions you can answer! Maybe your child asked a plot question on page one that they now have the answer for! Maybe your child asked a scientific question about why the tree has orange leaves and it’s time for you to do some research together to learn about why leaves change colors. The options are endless for this activity 🙂

In conclusion, learning is about engagement. Unfortunately, with zoom calls and google classroom being the go to strategy for most remote learning school plans, it can be hard to get kids curious about learning and active in academics. My hope is that this blog post gave you some ideas as a power parent and educator about how remote learning can be something as simple as a bed-time book turned scavenger hunt 🙂 The goal is not to add more to your plate, but change your mindset around what learning looks like. So that any parent, full-time supermom or dad, will be able to add hands-on learning to their child’s day.